WordPress-powered website’s CRON is used to schedule tasks at periodic fixed times, dates, or intervals like scheduling a post to publish, checking for updates of themes and plugins, or a backup plugin running on a predefined schedule.
For faster performance of your website, you can disable (pause) its cron via wp-cron.php in your cPanel for some time.
WordPress provides a cron service via WP-Cron which is used to simulate a system cron.
Depending on the amount of traffic to your site, using the built-in WordPress cron can actually start to impact your page load times. So today we’ll show you how to disable WP-Cron (wp-cron.php) and instead use a system cron for faster performance.
Why should one disable WordPress cron on one’s website?
We manage a lot of high-traffic and demanding sites and blogs, thus, we’ve seen a lot of performance issues with the WordPress built-in Cron (WP-Cron). First off, it’s important to understand that WP-Cron is not a real cron, they simply created it to mimic what a system cron does.
WP-Cron should not run continuously. By default, the wp-cron.php run on every page load, which on high-traffic sites can cause problems. If a site doesn’t have enough PHP workers, sometimes a request will come in, WordPress will spawn the cron, but the cron has to wait for the worker, and therefore just sits there.
The reverse scenario is also true. If a site doesn’t have a lot of traffic, schedules could be missed due to the fact that no one has loaded a page.
A better approach is to disable WP-Cron and use the system cron instead. This runs on a pre-defined schedule and WordPress even recommends doing so in their official Plugin handbook.
How to disable default WordPress cron
To disable WP-Cron, follow the steps below:
- Login to your cPanel,
- Navigate to the file section
- Click the file manager button
- Navigate to the public_html and double click it
- Look for wp-config.php file and add the code “define (‘DISABLE_WP_CRON’, true);” to it just before the line that says “That’s all, stop editing! Happy blogging.

Note that this code only helps to disable WordPress cron from running on page load directly via wp-cron.php.
Now, how can you set cron on your WordPress website? You need to set up a scheduled system cron on your website and below is how to do it step-by-step.
How to Create Cron in cPanel for WordPress website
Via your WordPress website cPanel, you can create a system cron.
Note: make sure you disable the default WP-Cron first as shown above.
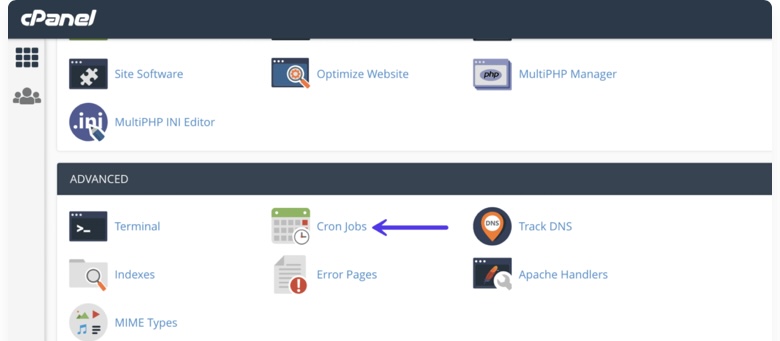
Step 1: Log in to your cPanel and navigate to the Advanced section. Then click on Cron Jobs.
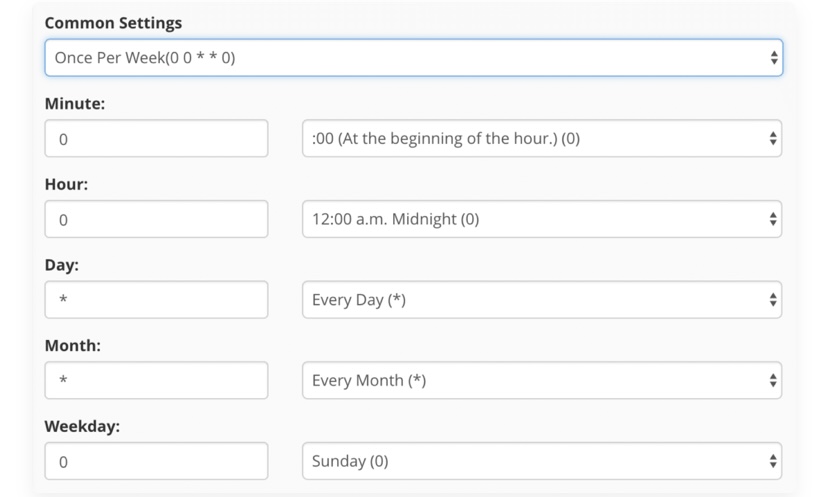
Step 2: Under the Add New Cron Job section, you can choose from a number of different pre-defined schedules, such as twice per hour or once per week. Your hosting provider most likely has a limit on how often they allow cron jobs to be run. Twice per hour is a common setting for shared hosts.
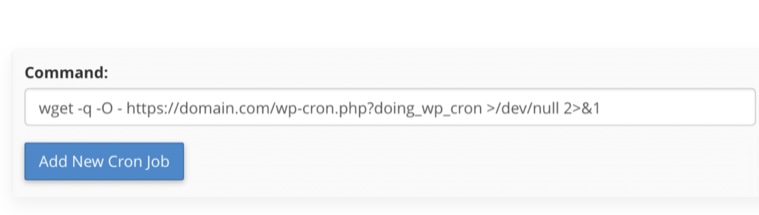
Step 3: Add the following command (code), wget -q -O – https://domain.com/wp-cron.php?doing_wp_cron >/dev/null 2>&1. Please remember to replace https://domain.com with your domain name.
Step 4: Finally, click on “Add New Cron Job.”
Conclusion
Disabling cron on website is not compulsory for a website that has low traffic and little plugins as wp-cron is okay for you. But if your website is large or you are getting a lot of traffic on your website, it’s ideal to disable default WordPress cron and install a cPanel cron by following the steps outlined in this guide.
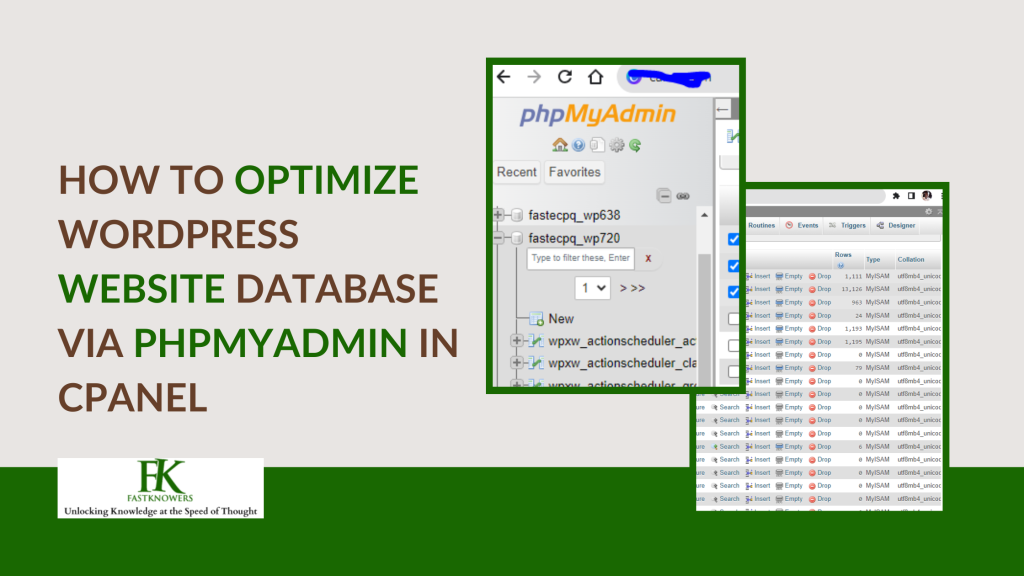
Hope this article has helped you understand how to make WordPress websites perform faster by disabling its default cron via cPanel for free. You may also see our expert step-by-step guide on how to optimize WordPress website database via cPanel.
If you know that this article is helpful, then subscribe to our YouTube channel for more updates. You can also find me on Facebook. Please remember to share this guide on social media platforms to show care to others 👶