Do you want to know how you can troubleshoot the errors on a WordPress blog?
There are many types of errors affecting a WordPress website. Most of the time, many beginners find the error impossible to fix.
In this article, we shall show you how to troubleshoot an error on WordPress. Now, let’s start.
Why you need to troubleshoot error on WordPress?
People troubleshoot error on WordPress because of one or more errors that their website or blog encounter. If you don’t know how to fix the WordPress error, it is advised that you troubleshoot it as shown in this guide.
Are you presently encountering WordPress error on your site and want to troubleshoot it on your own? You can follow the steps below to solve any troubleshooting you might’ve been facing.
Sometimes, an oops error may occur on your WordPress blog or website as shown in screen shot below.

In this beginner’s guide, we will show you how to troubleshoot WordPress errors, step by step. You may also need to see our expert guides on how to clear the cache of different web browsers on a Windows operating system.
1. Find out what your error message is
Anytime you’ve started experiencing an error on your WordPress website or blog, before you start to troubleshoot it, first, research to get an error message in the tab where you’re trying to access your website in order to know whether an error is a common one like the 404 error, error establishing a database connection, etc.
Sometimes, the HTTP error can appear inside the media library when you login your WordPress admin area.
By now, you should’ve known that every WordPress error is different. If you have an error message, then it makes sense to look for instructions on how to fix the exact error, rather than seeking for guides on how to troubleshoot WordPress over all errors in general.
You can search for articles that discuss the error you’re getting by simply typing or pasting your error message into the search bar at the top of fastknowers.com.
We’d written an article about how to fix ‘Error Establishing a Database Connection’, hence, if you enter any query related to that via our search bar on our blog, a complete guide to fixing the database connection error will bring up a.
You can also learn the steps on how to fix the problems you’re having on your WordPress website through a debugging message system that naturally comes with any error.
2. Create a complete backup of your website
After finding the cause of the error message on your WordPress blog, the next thing you would do in order to be able to troubleshoot it is create a complete backup of your blog.
Backups are very important to keep as they allow you to restore your site easily when something goes wrong. If hackers or spammers have harmed your WordPress website, you may use the backups for security threats, hacking, and data loss.
We recommend that you should make sure that you have a recent backup of your website saved somewhere.
While you can use a UpdraftPlus plugin to save your blog’s recent backups in your WordPress dashboard, we still don’t recommend that because something may happen that can make you unable to log in to your dashboard.
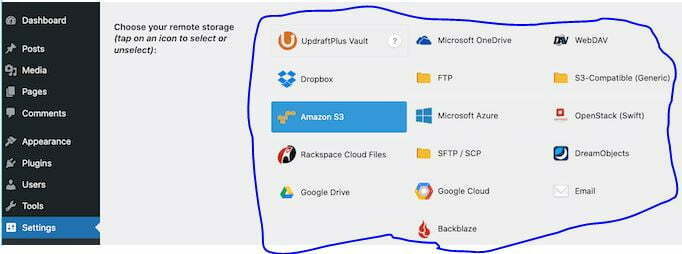
Your WordPress website and blog backups are important, you may save them in cloud storage like Google Drive or Dropbox.
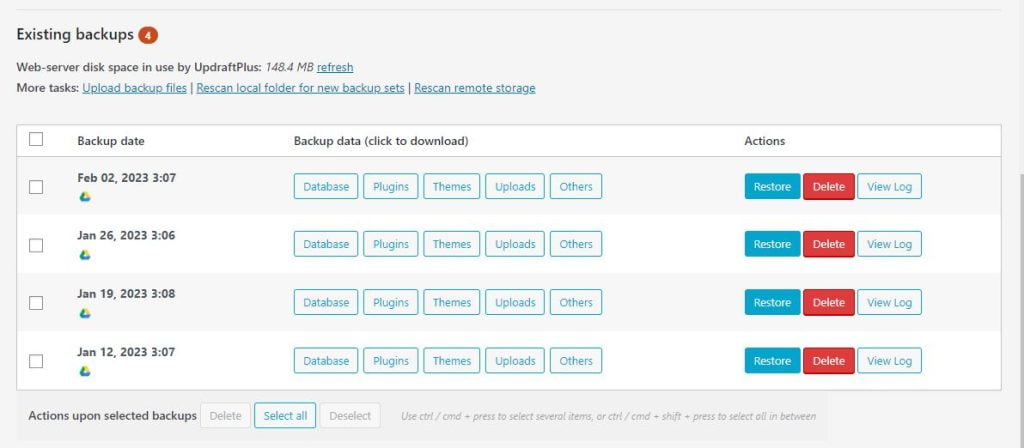
UpdraftPlus, one of the most powerful and most used WordPress backup plugins lets you save your website backup files to multiple locations.
https://www.youtube.com/watch?v=zw_xrxdCEXg
If you have been searching for the best backup plugin to use to create a complete or partial backup of your WordPress blog and website, then you would need to start using UpdraftPlus.
We recommend UpdraftPlus because it’s very powerful. It helps you manually back up your database and files of your blog even though you don’t have access to the admin area of your WordPress site.
3. Clear your browser cache
Sometimes, your browser may not realize that a WordPress page or post has changed and will load an outdated page from the browser cache. This means you will see an older version of your page or post.
If you’re seeing outdated content, then you may just need to clear your browser cache.
Here is how to clear the Google Chrome web browser cache
- On your computer, open Chrome.
- At the top right, click More.
- Click More tools. Clear browsing data.
- At the top, choose a time range. To delete everything, select All time.
- Next to “Cookies and other site data” and “Cached images and files,” check the boxes.
- Click Clear data.
You may see our guide here on how to clear cache of different browsers like Bing, Firefox, etc. for more information.
4. Clear your WordPress cache
If your WordPress website is showing outdated content, you may need to clear your WordPress cache.
However, with a WordPress caching plugin like WP Rocket, you may be seeing a cached version of your website.
If you are using FastComet hosting to manage your WordPress website, you would have a built-in caching software which shows you a cached version of your website even if you don’t have a caching plugin. installed on your blog.
5. Deactivate all your plugins
Some errors on your website are caused by plugins conflicting with each other, your theme, or the WordPress core.
To troubleshoot an error caused by plugin, simply deactivate all your WordPress plugins and then reactivate them one by one, to notice when the error happens again.
To deactivate plugin on your website, login to your WordPress dashboard and head over to the plugins page.
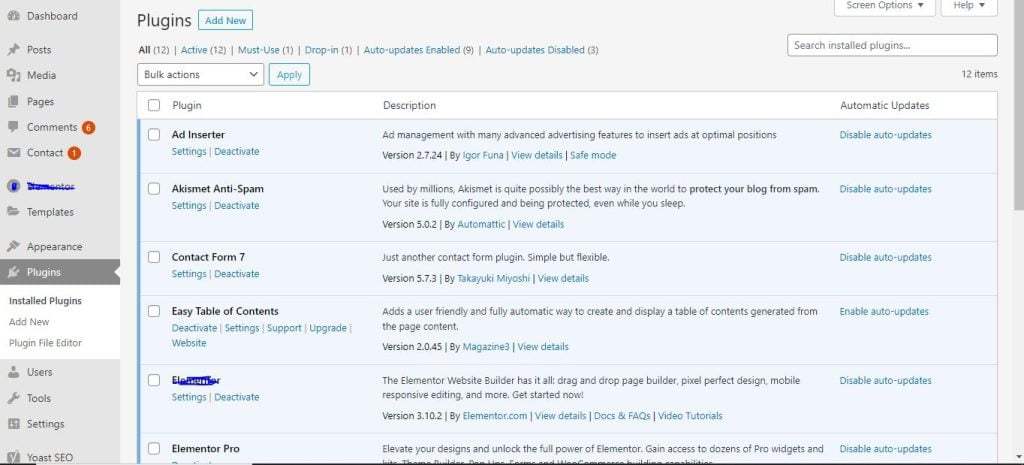
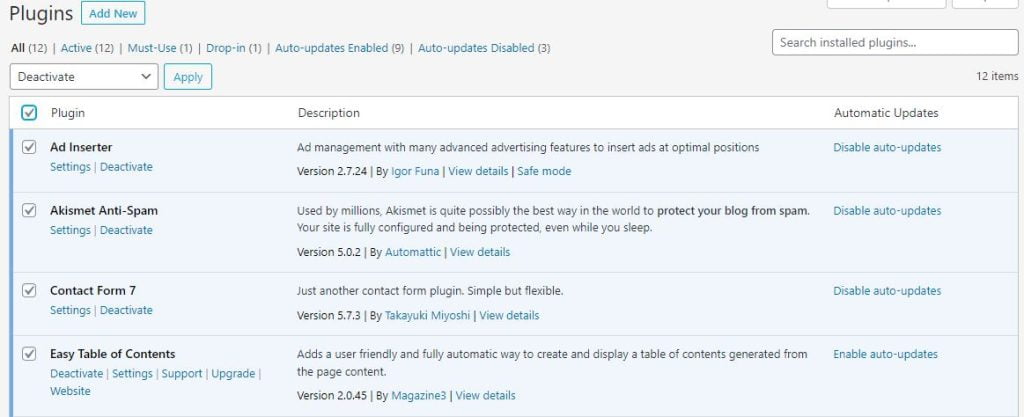
Check the box beside plugin, choose the ‘Deactivate’ from ‘Bulk Actions’ drop down menu and click on the Apply button to deactivate all selected plugins.
Note however that some errors may disable you from logging into your WordPress admin area. In this case, we recommend you use FTP to deactivate your plugins.
To do that, connect your WordPress hosting files using an FTP client. You may read this article on how to use FTP to upload files to WordPress.
Now, log in to your FTP account and open the ‘wp-content’ folder.
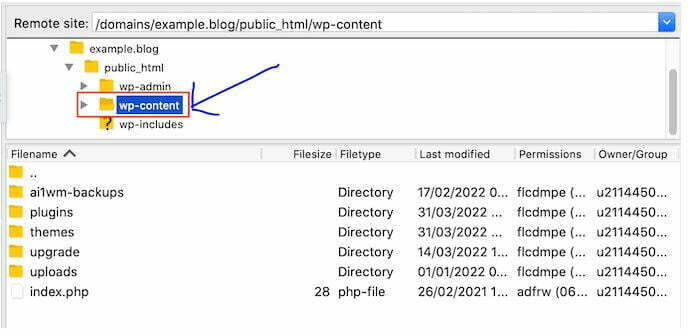
Control-click or right-click the folder named ‘plugins.’ and select ‘Rename.’ You may see our guide on how to install plugin on a WordPress website.
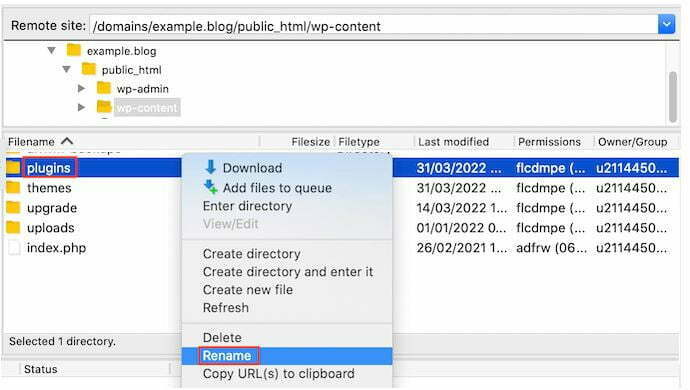
Now, rename it to ‘plugin.deactivate.’ to deactivate all the plugins installed on your WordPress website.
Once it’s successfully been deactivated, check to see whether the problem is still happening on your WordPress blog. If after deactivating all the plugins your blog start working perfectly, then one of your plugins is having the problem.
To know a particular plugin that is causing the error, simply reactivate your plugins one by one, to see when the problem starts happening again.
To get started, go to Plugins » Installed Plugins. You can now find the plugin that you want to reactivate and click on its ‘Activate’ link.
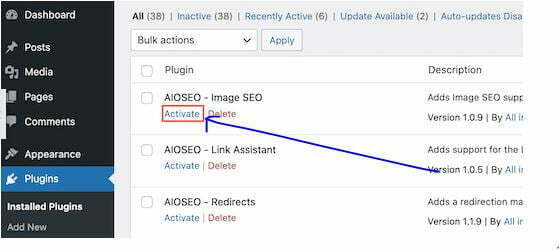
In the process of activating plugins on your WordPress blog one by one the problem reappears, you’ll know which plugin is causing the problem. We advise that you should refresh your blog anytime you have activated a plugin to easily find out the one that is really causing the error.
5. Switch to a Default WordPress Theme
Some WordPress themes cause error on a blog. To find out if your theme is causing the problem, you can try switching to a default WordPress theme like Twenty Twenty-Two or Twenty-Twenty Three.
Since these themes are created by the official WordPress team, they’re less likely to cause conflicts or have bugs compared to some other third party themes.
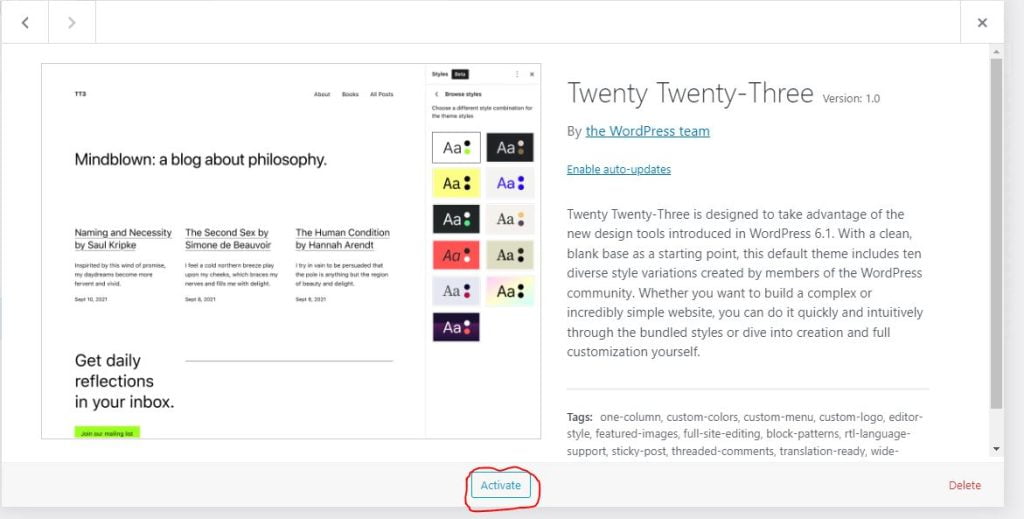
To switch to a default WordPress theme, login to your WordPress dashboard and go to Appearance » Themes.
You can then hover your mouse over any of the default themes.
Then, just click on the ‘Activate’ button.
However, if you can’t log into your WordPress admin area to deactivate to a default theme as described above, then use FTP method as explained below.
To use FTP you must first, connect to your website using an FTP client. Once it has connected and you have logged in to your FTP account, head to the ‘/wp-content/themes/’ folder.
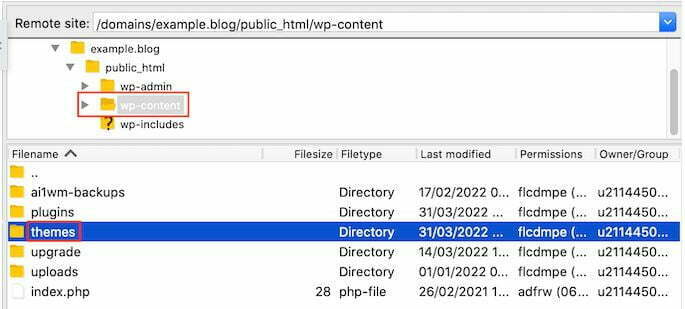
The theme folder contains all the themes installed on your WordPress website.
Download a copy of your current active theme in order to make easier to restore your theme after doing this test.
To download your current active theme, find the folder that has this theme’s name, control-click or right-click it and select the ‘Download.’ option.
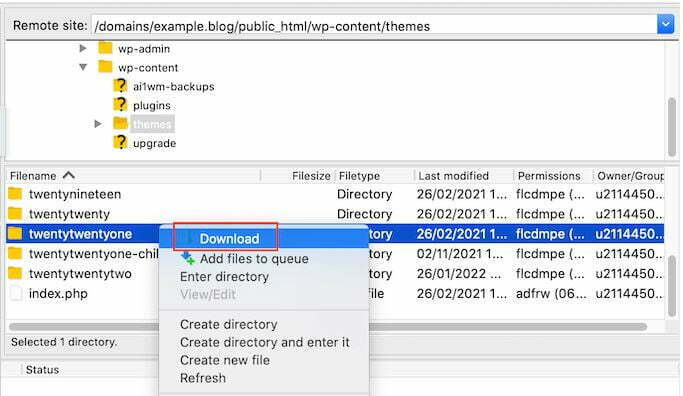
Once you’ve downloaded this folder, you can go ahead and delete every theme inside your FTP client except a default WordPress theme like Twenty Twenty-Three.
Since your active theme is no longer available, WordPress will automatically switch to using the default theme.
If after deactivating your active theme and start using the WordPress default theme the error has stopped, then you should know that your theme was causing the problem.
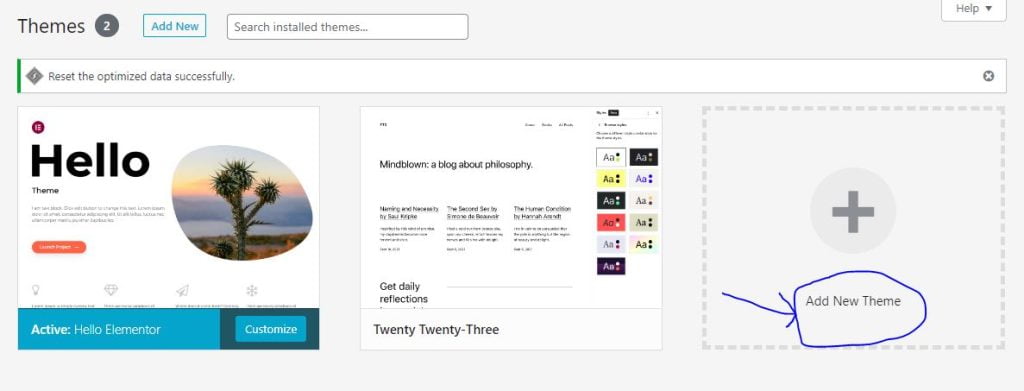
Now, you can login to your WordPress dashboard and find a new theme for your blog.
6. Refresh Permalinks
WordPress uses an SEO friendly URL structure. Sometimes this permalink structure is not updated or set up properly, which may result in unexpected 404 errors on your site.
If you’re getting 404 errors, then you can try regenerating your links, which will rebuild and repair your permalink structure. You can do this with the click of a button, and without changing anything on your WordPress website.
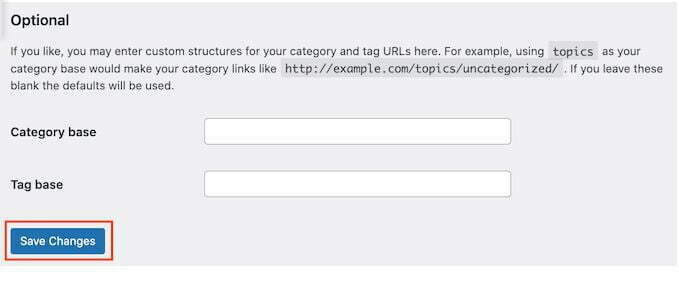
To regenerate your permalinks, go to Settings » Permalinks.
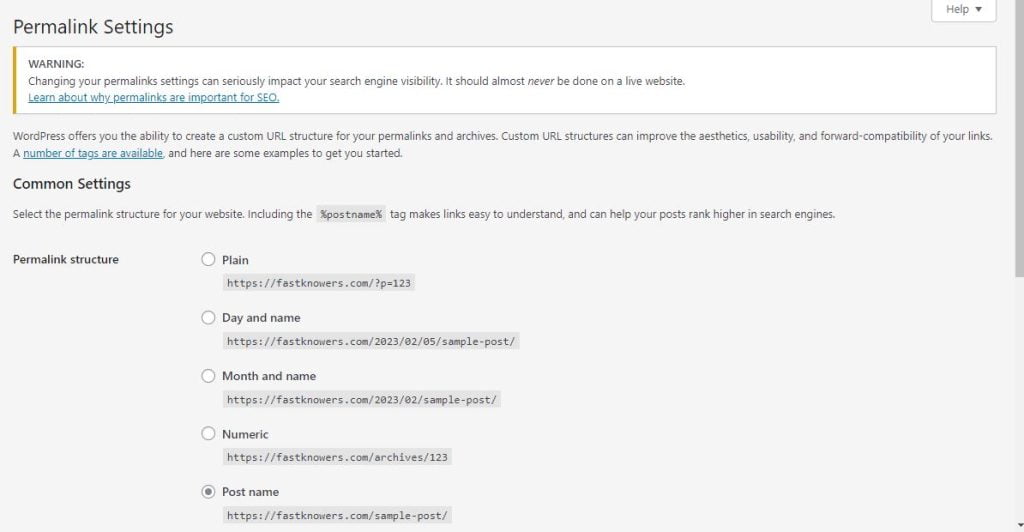
Now scroll to the very bottom of this page and click on ‘Save Changes.’
After a few moments, you should see a message confirming that WordPress has updated your permalink structure.
7. Backup and Delete .htaccess File
Are you getting an internal server error? A corrupt .htaccess file might be to blame.
The easiest way to fix your .htaccess file is by deleting it. WordPress will then create a new .htaccess file automatically.
To delete your current .htaccess file, connect to your site using an FTP client. You’ll find the .htaccess file in your site’s root directory.
To get to this root directory, simply open the folder that shows your website’s name.
Then go ahead and open the ‘public_html’ folder.
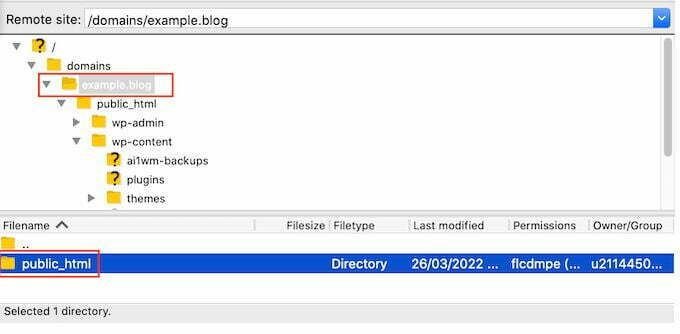
You will now see your .htaccess file inside this folder.
If you don’t see .htaccess, then your FTP client may be set to hide sensitive files. For more information, see our article on why you can’t find the .htaccess file on your WordPress site.
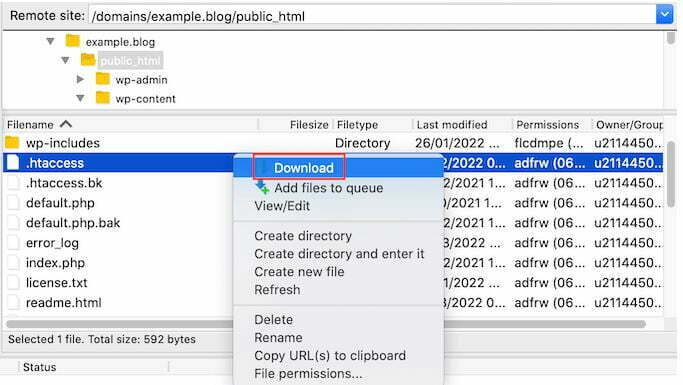
Before doing anything, it’s a good idea to create a copy of your current .htaccess file. Then if anything goes wrong you can simply restore your original file.
To download your .htaccess file, give it a click and then select ‘Download.’
Once you’ve done that, you can go ahead and delete the original .htaccess file in your FTP window. After that, go to Settings » Permalinks in your WordPress admin area.
Finally, click on the ‘Save Changes’ button. WordPress will now go ahead and create a new .htaccess file for your website.
8. Fix the WordPress site URL
If you have the wrong settings for your ‘WordPress Address’ and ‘Site Address’ options, then it can cause redirect issues, 404 errors, and other common problems.
To take a look at your URL settings, visit the Settings » General page.
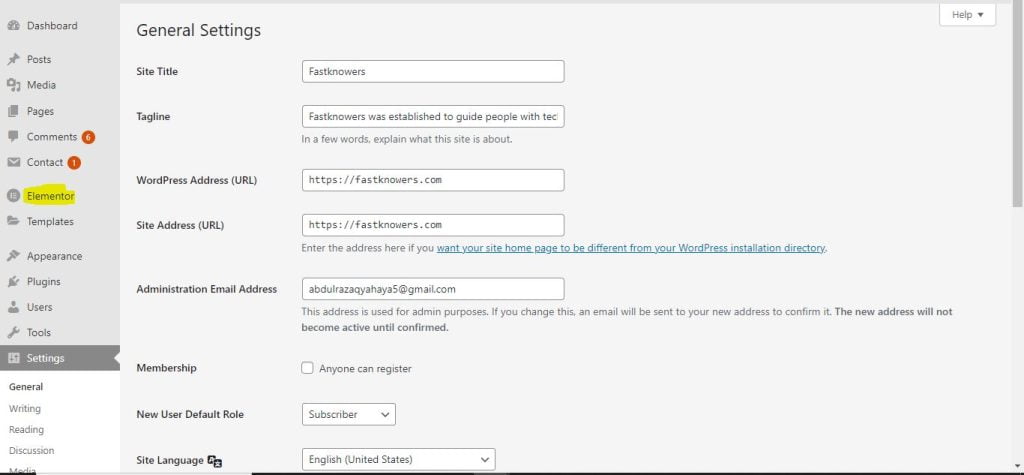
On this page, find the ‘WordPress Address (URL)’ and ‘Site Address (URL)’ fields.
You need to make sure both of these URLs are exactly the same.
If you can’t access the admin area of your WordPress site, then you can change these URLs using FTP.
After connecting to your site using an FTP client, there are two ways to access these URLs.
How to update WordPress URL and Site URL settings in wp-config.php file
With this method, you’ll add some code to your site’s wp-config.php file.
You’ll find this file in the root folder of your website along with other folders like wp-content.
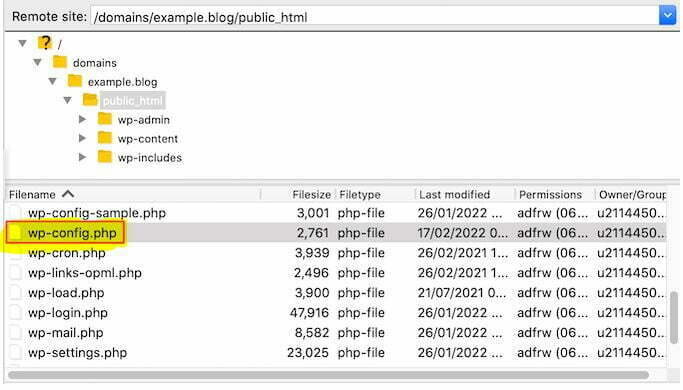
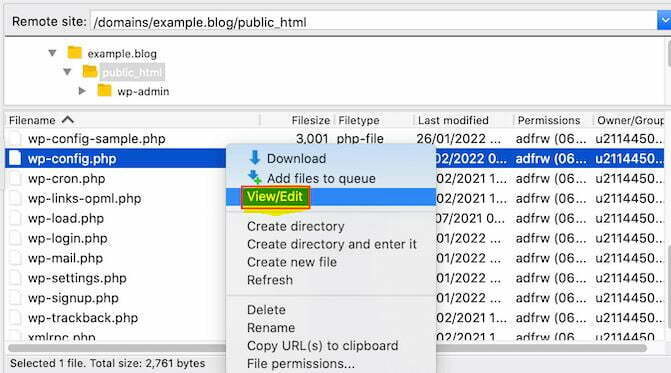
Once you’ve found this file, give it a click and then select ‘View/Edit.’
This will open the file in your computer’s default text editor, such as Notepad.
In this file, find the line that says:
/* That's all, stop editing! Happy blogging. */
Just before this line, add the following code:
					define('WP_HOME', 'http://example.com');
define('WP_SITEURL', 'http://example.com');
Don’t forget to replace ‘example.com’ with your own domain name. Now, save your changes and upload the file back to your server.
How to update URLs Using functions.php File
You can also update these URLs using your theme’s functions.php file.
In your FTP client, go to the ‘wp-content/themes/’ folder.
Then, open the folder for your current active theme and find its functions.php file.
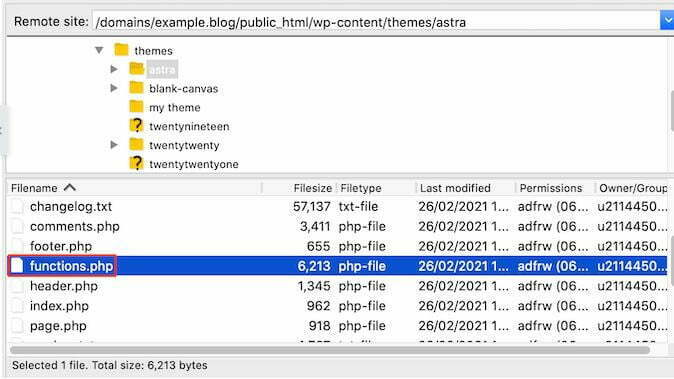
Next, you just need to click on the functions.php file and select ‘View/Edit.’ This will open the functions.php file in your computer’s default text editor.
Simply add the following lines at the bottom of the functions file:
					update_option( 'siteurl', 'http://example.com' );
update_option( 'home', 'http://example.com' );
You should now be able to access your WordPress admin area.
Once you’re logged in, go to Settings » General. You can now change your ‘WordPress Address (URL)’ and ‘Site Address (URL)’ following the same process described above.
Once you’ve done that, you just need to delete the code that you added to your functions.php file. To do this, simply open the functions.php file following the process described above, and then delete the code.
10. Uncheck your website reading settings
If you follow the WordPress SEO best practices, then search engines like Google should find your website automatically.
However, sometimes a newly created WordPress website won’t show up in search engine results. This may be because your site is hidden from search engines.
To check your site’s settings, go to Settings » Reading.
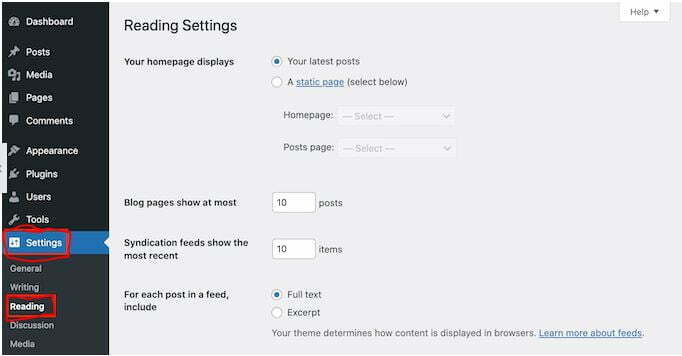
Once you’ve done that, scroll down to the bottom of the page and make sure that the box next to ‘Search Engine Visibility’ is unchecked.
This option discourages search engines from indexing your site.
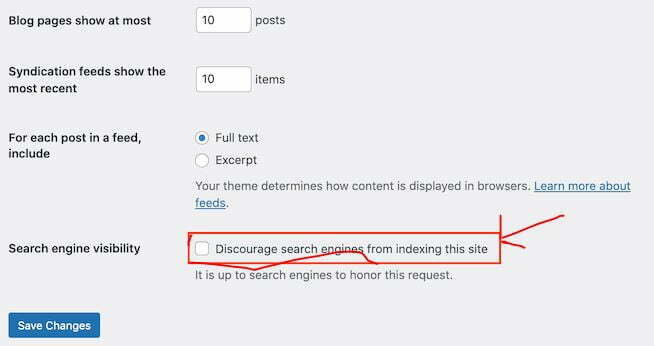
Website owners often use this setting when they’re still working on their site and don’t want their content to show up in search results.
However, you might accidentally check this setting and forget about it.
If you want your site to appear in search results, then make sure this option is unchecked and then click on ‘Save Changes.’
If you’re still working on your site, then you may want to create a coming soon page.
11. Troubleshooting email issues
Some WordPress hosting providers do not properly configure their mail settings. This can stop you and your visitors from receiving emails sent by WordPress.
No matter any WordPress form plugin you use, you won’t get an email when visitors complete your form. You will also not get any WordPress notifications including messages about serious security threats or suspicious activity.
You may read these guides on how to fix WordPress not sending email issues for more details.
12. Scanning your blog for malware
Sometimes, errors occur on WordPress blogs as a result of malware and spam. If you are showing an error it may be that it’s being infected by malware. To troubleshoot malware errors on WordPress, you should scan your website using a scanning plugin like Sucuri.
Sucuri is the best website security monitoring service for WordPress site owners. They’ve helped us block 450,000 WordPress attacks in 3 months.
13. Look for better support
By following these troubleshooting steps, you can fix most of the common WordPress errors.
However, if you’re still having problems with your site, then there are ways to get extra support.
WordPress has a large and helpful community. You can always ask other WordPress users and experts for help by posting in WordPress support forums.
Note that when reaching out to the community, it’s important to know that people use their time to answer your question for free, thus,:
- Be polite and nice. No matter how upset or frustrated you are, do not use harsh or unpleasant language.
- Mention your problem briefly. This will make it easier for people to see what the problem is, and decide whether they can help.
- Describe the troubleshooting steps you have taken so far. This shows that you don’t just want other people to do your work for free. It also means that people won’t waste their time by suggesting things that you’ve already tried.
- Upload screenshots on a cloud image-sharing service, and then add the links in your support thread. This can provide a deeper insight into your problem.
Conclusion
Hope this article has helped you learn how to troubleshoot errors on the WordPress blog and website. Next, you may want to check out our ultimate guide on how to add an add-on domain to your existing domain name on WordPress.
If you liked this article, then subscribe to our newsletter for free updates. You can also find us on Facebook.