One of the easiest ways to monetize a website or blog and earn a revenue based on impressions and clicks is partnering with Google AdSense. However, before you can start receiving payments, you have to go through the verification process which many people find difficult to do or impossible to do at all. In this guide, I will show you how you can manually verify your AdSense account to start receiving your AdSense payment.
Google AdSense is an advertising program run by Google that enables website owners to serve text, images, and video ads on their sites. AdSense works by matching ads to your site based on its content and the visitors. You may see our step-by-step guide on how to block visitors from certain locations on your website.
If you are you looking for a guide on how to verify your AdSense account after waiting to receive an official mail but did not get it? In this article, I have got you covered.

Now, let us get started.
Why do you need to verify your AdSense account?
AdSense requires you to verify your account to ensure that your details are accurate and that you are the legitimate owner of it. You need to verify your address, identity and sometimes your bank account (to some countries). If you don’t verify your account, you won’t be able to recieve any payments no matter how much revenue you’ve generated.
We frequently receive messages from people about the failure of their verification PIN to reach to them due to the fault from post office or others. Happily, you can still verify your account manually if you failed to recieve your verification PIN via mail.
Because there are two processes to verify AdSense account. The default process is using verification PIN which we may call it as automatic process and the second process (manual process) is using official identity document.
Step-by-step guide to verifying your AdSense account
Step 1. Setup AdSense account
Before you can verify your AdSense account, you need to create and set up the account. Here’s a brief overview of how to do that:
- Sign up: If you haven’t already signed up for a Google AdSense account, go to their website now and click on the “Get Started” button. From there, you’ll need to provide your website URL.
- Wait to get approved: Once you’ve signed up, your website or blog will have to be reviewed to ensure it complies with AdSense policies. This review can take a few days. Once approved, you’ll be able to log into your account and start placing ads on your site.
You may also see our expert step-by-step guide on how much does AdSense pay per page view.
Step 2. Verify your identity
The first verification process you will undergo before you manually verify your AdSense account is identity verification which they will ask you to upload your identity document.
When you signup for Goolge Adsense, You will have to provide your personal address. This address will be used to send a verification PIN once your payment reaches a verification threshold, which currently is 10 USD or its equivalent in local currency. It is very important to mention your current updated address because Goolge will not ask you to re-verify you address.
Your verification PIN will be sent directly to the postal address you have mentioned. So, If your address is not correct, you might not get a chance to correct your address when you PIN is sent and your PIN will not reach you. To be on the safer side always mention your latest, updated and accurate postal address.
Google does this to ensure that the correct person receives the payment. The logic is that who has created an Adsense account and provided the address, will be the one who receives the PIN.
- PIN mail delivery: Google sends a physical letter containing the PIN to your mailing address, and it typically takes 2-4 weeks to arrive.
- Entering the PIN: When you receive the letter, it will contain a unique 6-digit PIN. Log into your AdSense account, navigate to the verification section, and enter it.
How to edit your address in Google AdSense?
Once you login to Google Adsense, On the left hand side pane, navigate to Settings->Payment.
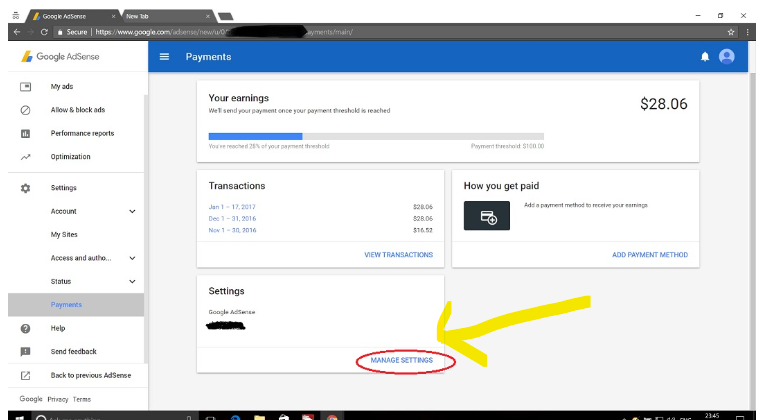
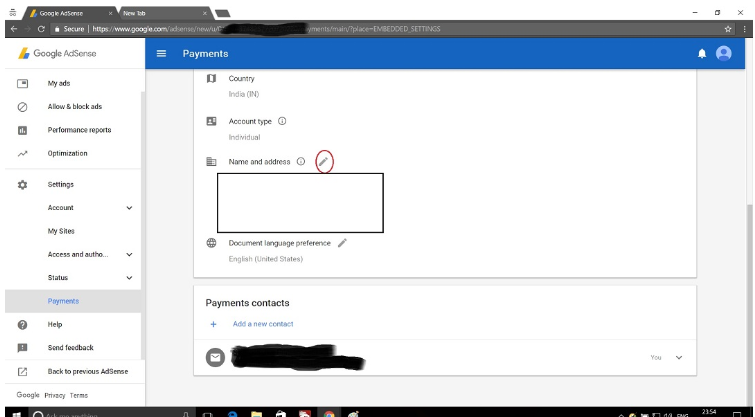
Click on MANAGE SETTINGS and scroll to the bottom of the page. There you will see a section for Name and Address. This reflects your current registered address. To edit the address, click the pencil icon as shown in the screenshort below.
How does Google address verification PIN look like?
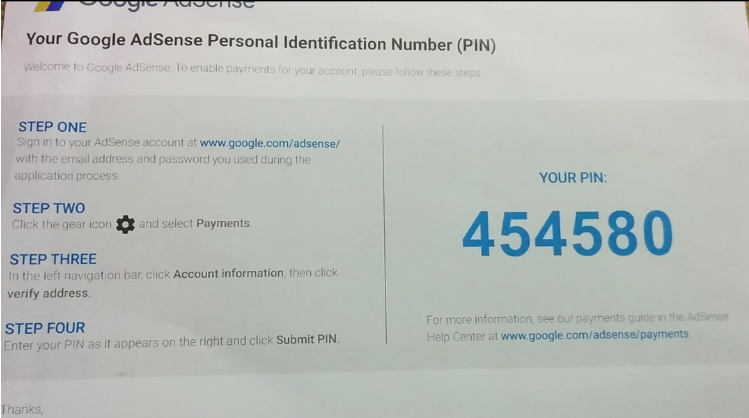
Google Address verification PIN will be sent to your mailing address as mentioned in the Google Adsense Account.
Note that verification PIN will NOT be sent by EMAIL or SMS but by Post office only.
The screenshot below is a verification PIN of one person that sent to us. The look of it may change over time and might not be the same as what I received. The looks can change, but what it will contain is a PIN.
How do you know if Google Adsense Address verification is Pending?
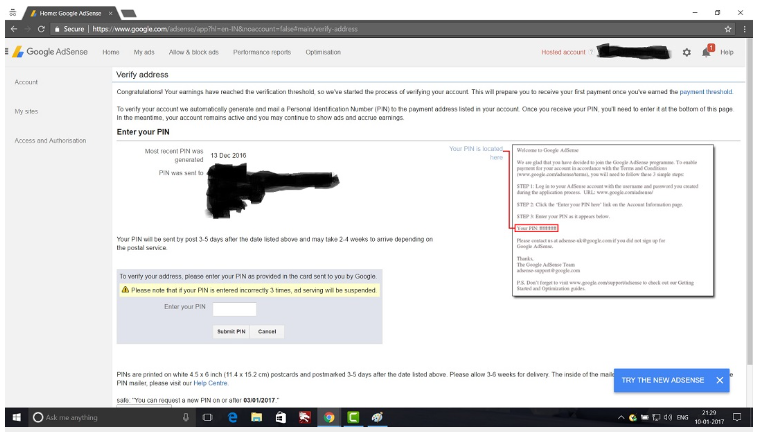
Google does not send a notification in the form of Email to inform you that Address Verification is pending. If you want to check, you have to login to your Adsense Account. Once you login, you will see a notification.
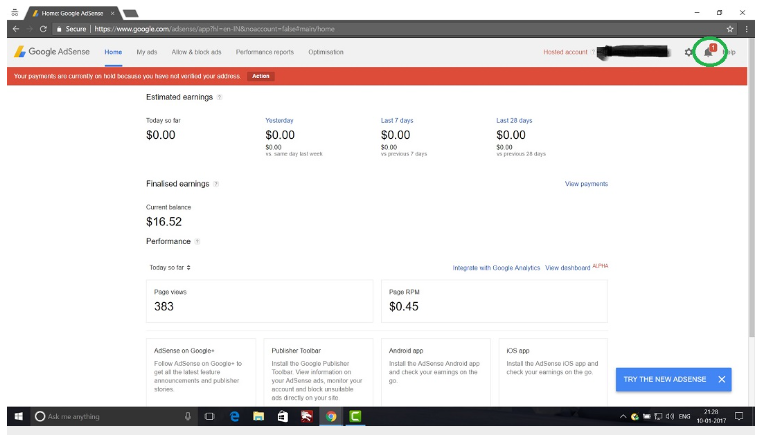
Once you click on the Action Button, you have to enter the PIN and Submit. You will also see the date on which your latest PIN was generated.
How do you know that your address is being validated after you submit the PIN?
After you have submitted the PIN, the box where you have entered the PIN will be grayed out and you will not be able to enter the PIN again until the address is verified. Google takes around 2-5 mins to validate the PIN. This time could be even less. If you have entered the correct PIN, the warning will disappear from your Adsense Page and you will not see the verify address notification in the Account Information section as described in the above sections.
If your PIN fails validation, you will again be able to enter the PIN and validate.
There is a limit to how many times you can enter the PIN and Submit. You can do it only 3 times. If you fail to submit the correct PIN for 3 times, Ads will stop showing on your blog or website until the address is validated successfully.
How to request for a new PIN?
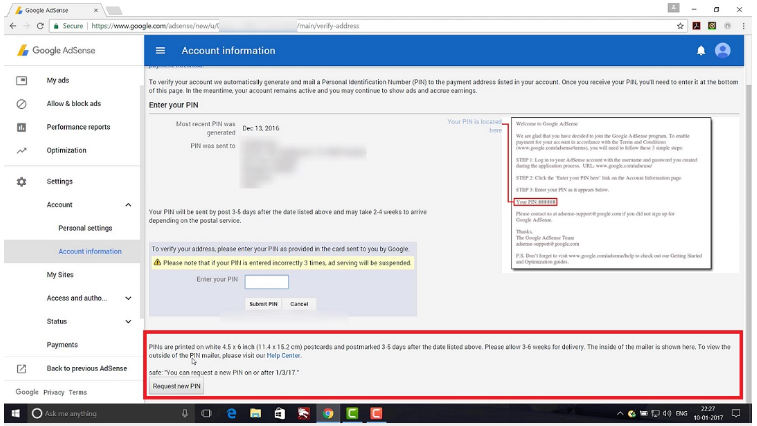
Google assumes that it might take 2-4 weeks to get your address verification PIN. For the first two weeks you will not see an option to request for a new PIN in the address verification page. After 2 weeks (in many people case), you will a notice an option to request for a new PIN.
So, if you have not received the PIN, don’t get anxious. You will see the option to request a new PIN after two weeks from the date date PIN was generated. The date on which the latest PIN was generated will be mentioned on the address verification page. You will also see a date on or after which you can request for a new PIN.
Before you request for a new PIN make sure that you have checked you address and updated it if required.
How to manually verify your address without PIN
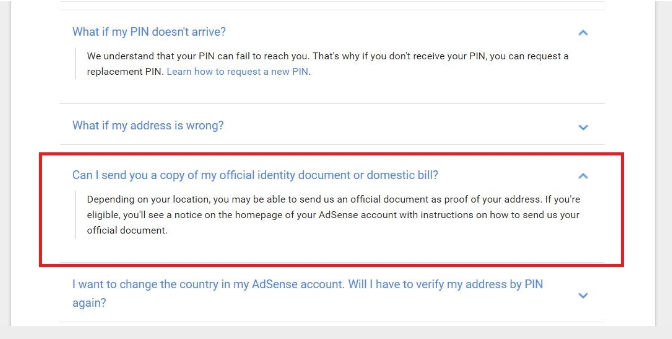
Verifying address with PIN is the easiest and the best option. If you have not received the PIN even after repeated attempts, there is a way to verify the address without PIN. it involves submitting a form with your details and uploading a government approved Identification Card with the address mentioned on it.
But according to the Google documentation, option to verify address without PIN depends upon your location. So not all people will see the option to validate without PIN.
The documentation does not mention the locations for which address verification without PIN is allowed or not allowed. So, It’s just an information to be kept in mind.
Sadly, the option to manually verifiy your AdSense without PIN is not available on your dashboard. It only becomes available if you have been unable to use verification PIN method for the maximum of three times. After you exhaust your 3 attempts to validate address with PIN, you will see an option to validate with a valid government approved Identification Card at the bottom of the address verification page. The option looks something like this with the link to the form.
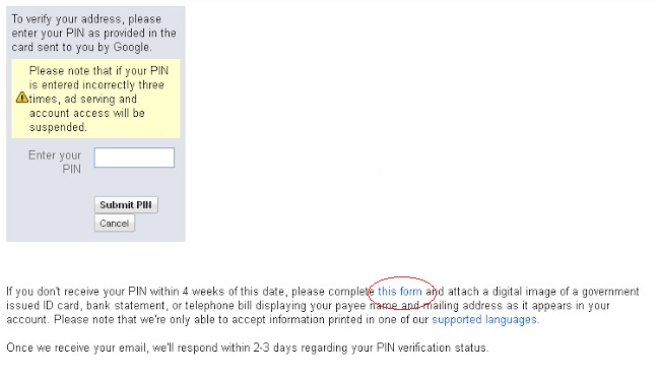
When you click on the link, you will have to fill in the following details:
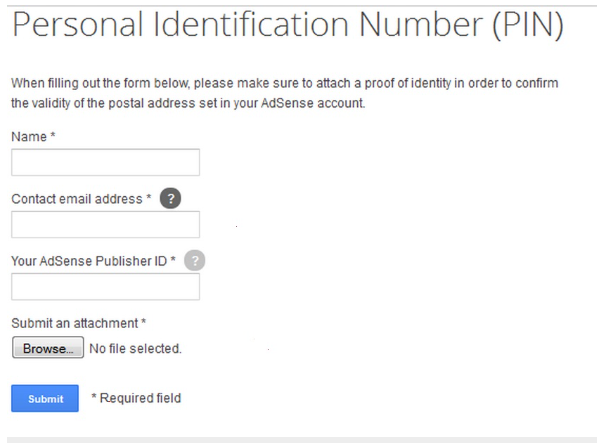
- Name: Enter your name as mentioned in the Adsense Account
- Contact Email Address: Enter you email address which Adsense Account is registered
- Your Adsense Publisher ID: Enter your Adsense Publisher ID. You can find this in Settings->Account->Account Information
- Submit an attachment: Upload scanned copy of any of your Government ID document.
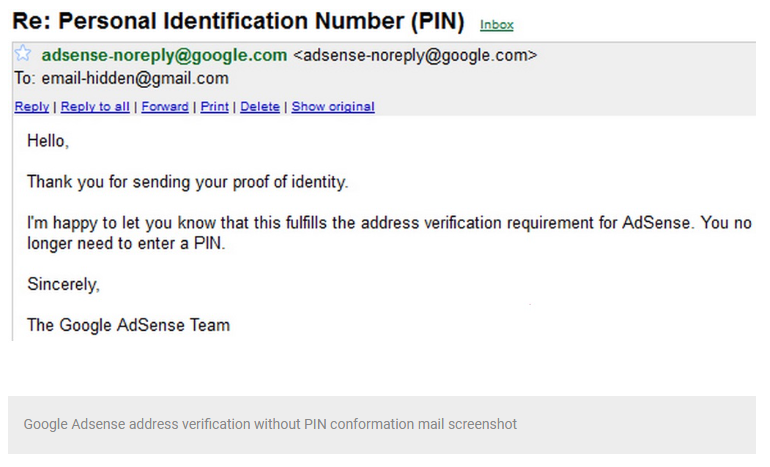
Submit the form and wait for your address to be verified by Google. It can take 2-3 days.
Below is the screenshort of one of our happy readers.
Conclusion
Hope this article has helped you know how to manually verify your AdSense account. You may see our guide on tips for quick AdSense approval for your blog.
That’s it. If you have any question, please let me know in the the comments section.
If you know that this guide has helped you know how to manually verify your AdSense account, then subscribe to my YouTube channel for more updates. You can also find me on Facebook.


I am from Nigeria. Please can I use NIN to verify AdSense account? It is only one type of document I have. Answer me please.
This is the third time of requesting my verification PIN. Am now happy to just knew that I can manually verify my account if I will can’t be able to get my Pin.
Hi Rebecca
Thanks for reaching out! I’m glad you found a solution. Manually verifying your account is a great option if you’re unable to receive your PIN