Some beginner web developers inquire that is HTML and CSS are enough to make a website. The short response is Yes. HTML helps you to add text, pictures, tables, lists, etc. on websites while CSS helps to style them such as giving color, font style, font family, alignment, etc.
Every Web Developer wants to be an expert, hence the need to learn HTML in any case. In the wake of being helpful with HTML, proceeds to the process of realizing, which is CSS. The current pages are so strong and made of trend-setting innovation. You may see our expert guide on how to create a scroll navigation link using # and ID.
Assuming that you require a static site that shows text, pictures, connections, and fastens delightfully, HTML and CSS is all that could possibly be needed to get you a gorgeous presentation page or even a business site. We should begin learning the center ideas of HTML and CSS, and toward the finish of this instructional exercise, you will actually want to make a wonderful site simply by utilizing HTML and CSS.
Methods to create a site using HTML
You should know about every one of the essential ideas and methods related to HTML prior to ordering every last bit of it to make a site utilizing HTML and CSS. There are numerous activities you will perform while composing code in HTML.
Each page on the web utilizes HTML to structure its page and show content. The source code of an HTML record will look something like this.
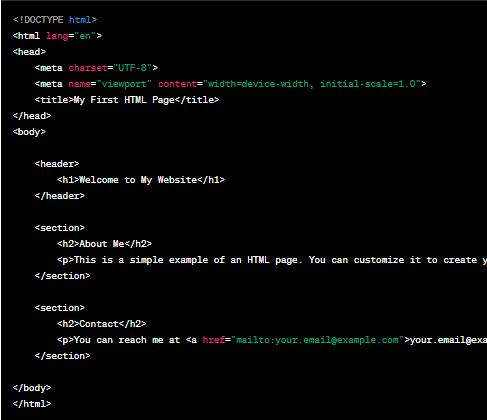
In HTML, tags are the structure blocks for an HTML record. It generally contains an initial, an end, and the substance between them. It assists programs with interpreting in characterizing the substance, like headings, pictures, and passages/paragraphs.
Top HTML tags
- Headings from largest to smallest:
<h1>,<h2>,<h3>,<h4>,<h5>,<h6> - Represents a paragraph of text:
<p> - Defines a hyperlink:
<a> - Embeds an image
: <img> - Defines an unordered list:
<ul> - Defines an ordered list:
<ol> - Defines a list item within
<ul>or<ol>:<li> - A generic container element is often used for grouping and applying styles:
<div> - A generic inline container element:
<span> - Represents a line break:
<br> - Adds a horizontal rule (line):
<hr>: - Helps to stress text: <em>
When using any of these tags, select HTML tags based on the content you want to display, like <p> for paragraphs or <img> for images. Place your text, images, and other elements between the opening <tag> and closing </tag> tags to structure and define their purpose. You may see our expert guide on how to use the Span tag with CSS.
Inline-level and Block-level tags in HTML
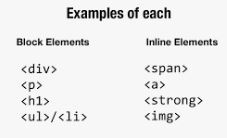
In HTML, elements are categorized into two main types based on their display behavior: inline-level and block-level.
- Block-level Elements:
- Examples:
<div>,<p>,<h1>to<h6>,<ul>,<ol>,<li>. - Behavior: Takes up the full width available, starts on a new line, and extends vertically to create distinct blocks of content.
- Examples:
- Inline-level Elements:
- Examples:
<span>,<a>,<strong>,<em>,<img>. - Behavior: Occupies only as much width as necessary, does not start on a new line, and flows within the content, allowing elements to appear in line with the surrounding text.
- Examples:
Switching between Inline-level and Block-level tags in HTML
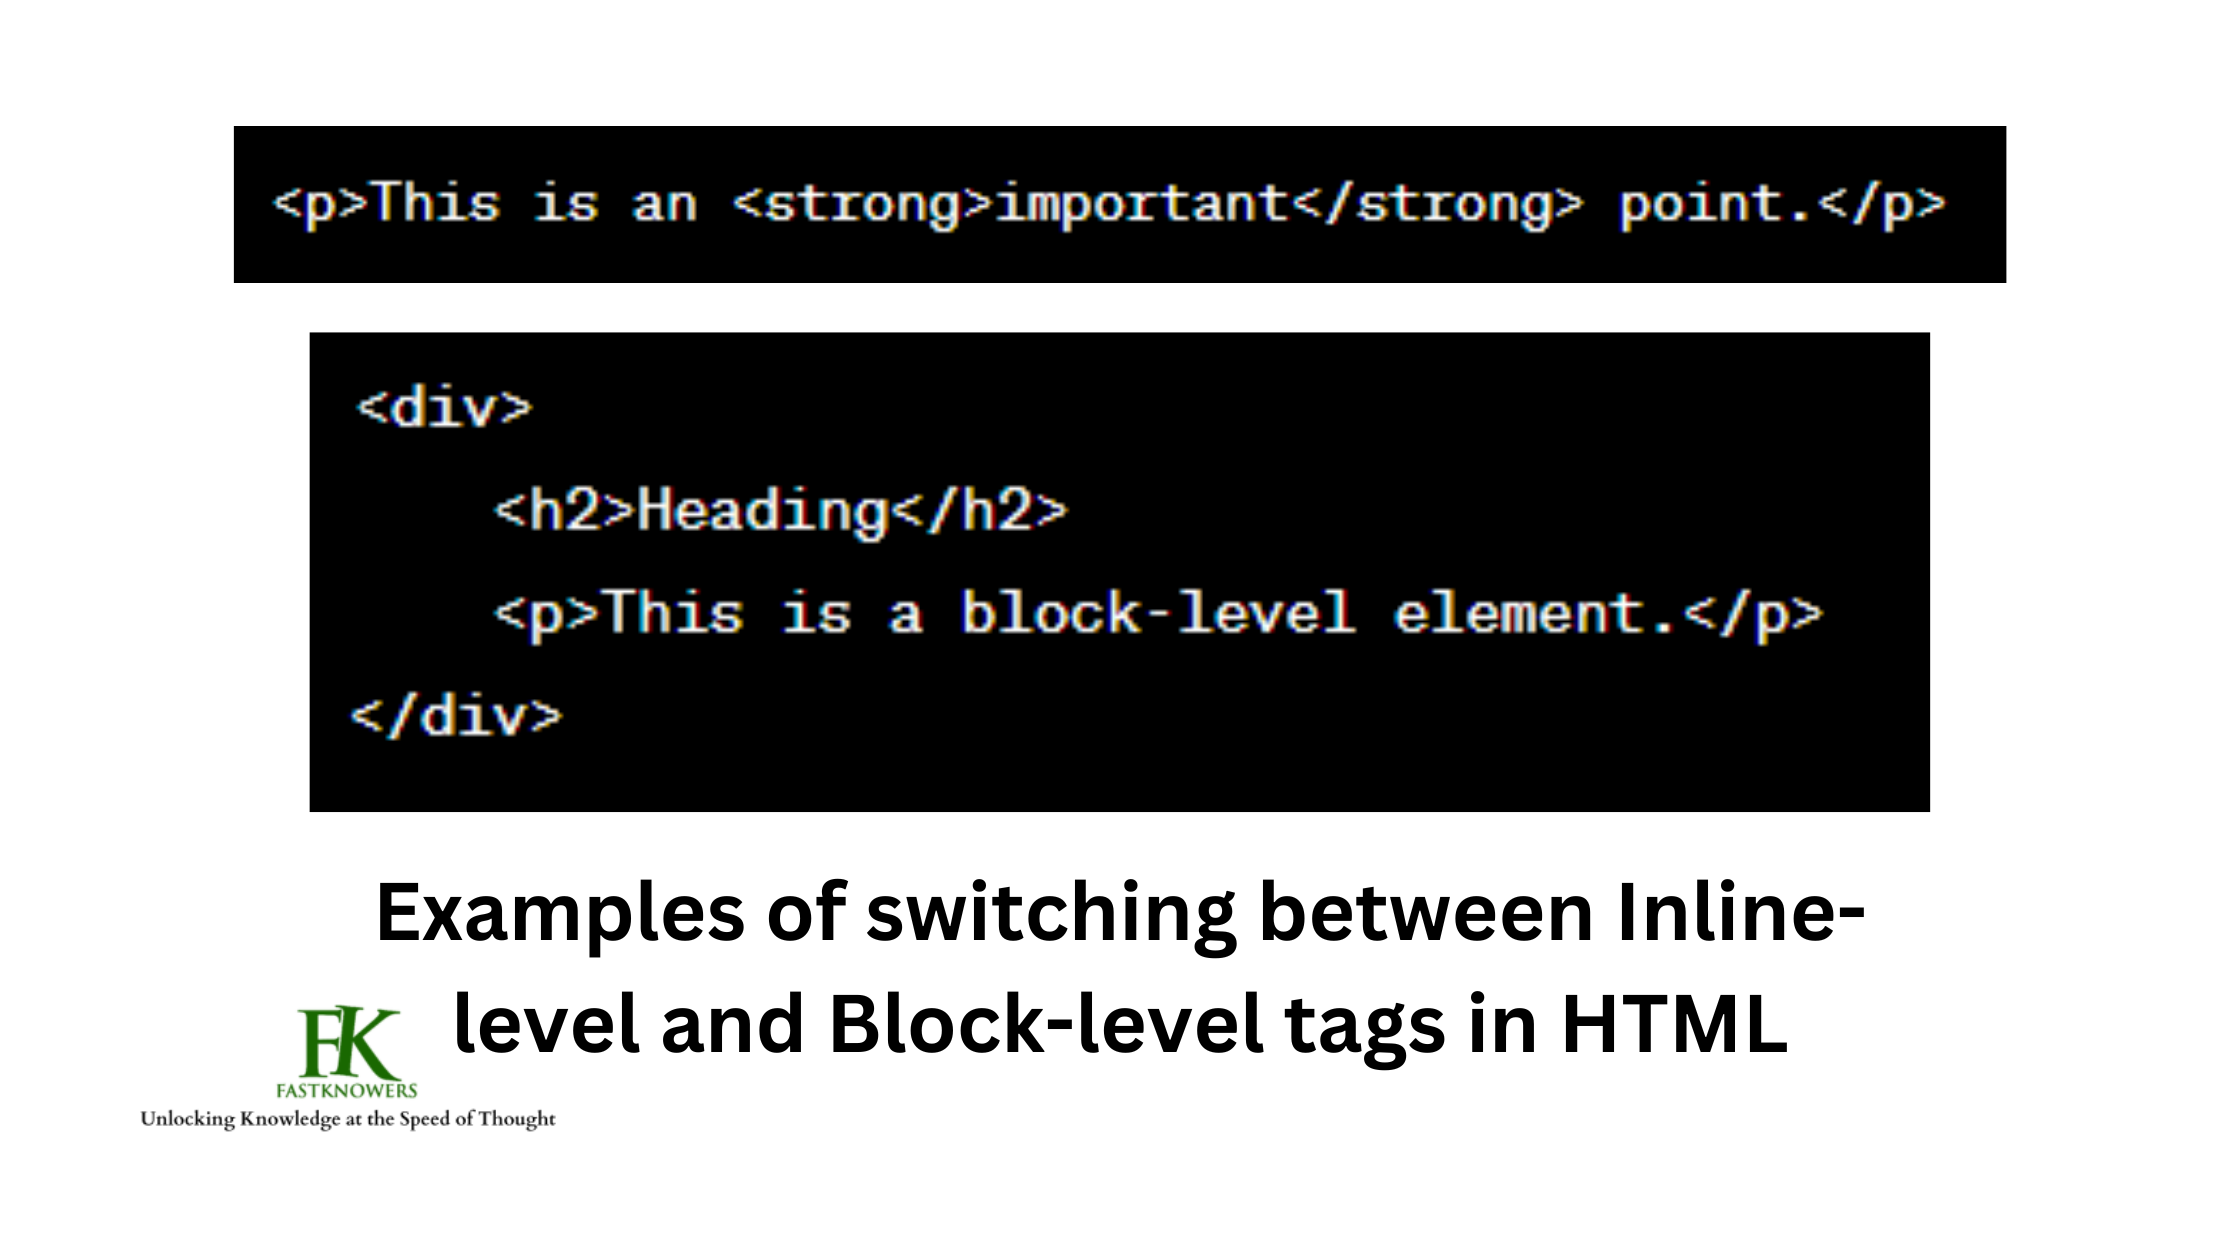
Switching between inline-level and block-level tags in HTML involves selecting appropriate HTML elements based on how you want the content to be displayed. Here’s a brief explanation:
- Inline-level Tags:
- Inline-level elements flow within the content and do not start on a new line. They only take up as much width as necessary. Examples include
<span>,<a>,<strong>,<em>, and<img>.
<p>This is an <strong>important</strong> point.</p> - Inline-level elements flow within the content and do not start on a new line. They only take up as much width as necessary. Examples include
- Block-level Tags:
- Block-level elements start on a new line and take up the full width available. They create distinct blocks of content. Examples include
<div>,<p>,<h1>to<h6>,<ul>,<ol>, and<li>.
<div> <h2>Heading</h2> <p>This is a block-level element.</p></div> - Block-level elements start on a new line and take up the full width available. They create distinct blocks of content. Examples include
To switch between them, choose the appropriate tag based on how you want the content to be displayed. For instance, use a <span> for inline styling within a paragraph, and use a <div> for creating a block-level container for multiple elements. Understanding when to use each type of element is key to structuring your HTML for the desired layout.
Switching in HTML helps to apply a few HTML labels to a solitary substance, hence, one tag can be put inside different tags. One more advantage of switching between Inline-level and Block-level tags in HTML incorporates working on the clarity of your code for yourself and different designers.
How to create a site using CSS
Before we look at how to create a website using CSS, let’s first know CSS Rules.
CSS is called rulesets and is a mix of at least one CSS property that you can apply to at least one HTML component. It comprises a selector and properties. The selector figures out what to style to a designated HTML component.
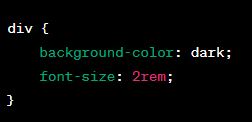
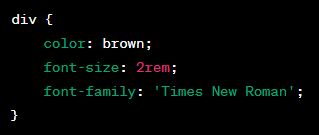
Assuming we want to write CSS for a div element, here’s an example of how to write:
background-color: dark;: This sets the background color of thedivto a color named “dark.” Note that in standard CSS, you would usually use specific color values or codes (e.g.,#000for black).font-size: 2rem;: This sets the text dimension (font size) of the content inside thedivto 2rem. Theremunit is relative to the font size of the root element, providing a way to create a responsive design.
In this case, it makes a CSS rule focusing on the div component and making CSS properties, line tone, and text dimension to be the style for the div component.
You can also go further to add font family to your CSS code. In the example below, we added a Times Roman’s font family to the code:
Styling website’s images with CSS
In this segment, we should figure out how to style images with CSS, for example, adding a boundary to a picture, changing its aspects, and further unambiguous CSS to our pictures on the page. To start with, add an image component in the HTML record.
<img src=”fastknowersbook.jpg” alt=”Image of Fastknowers e-Book”>
Now is the ideal time to add CSS to the image below.

This CSS will apply to every one of the pictures in your HTML archive.
Styling Classes with CSS
Presently, how about we perceive how to make classes with the assistance of CSS? here, we will figure out how to apply CSS leads just to the HTML components that have explicit classes. To begin with, we should make an HTML component that has some class, and afterward, we will apply CSS to the whole class. Applying CSS to the whole class will permit us to style every one of the components that have the specific class.
<img src="Fastknowers bookcover.jpg" alt="This is Fastknowers e-book cover" class="bookcover"> <h2 class="bookcover">Introduction to Fastknowers</h2> <p class="bookcover">Explore the content of the Fastknowers.com e-Book</p>
In this code, we can distinct components having a similar class. When we apply CSS to the class, it will be applied to every one of the components having a place with a similar class.
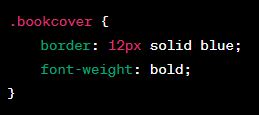
To involve the class as a selector while making a CSS rule, we utilize the ‘.’, e.g., .bookcover image prior to composing the class name in the CSS record.
Styling IDs with CSS
Involving IDs as selectors while making CSS rules is like involving classes as selectors. IDs are exceptional in the HTML report and no two components can convey similar IDs. They are by and large applied to the components that are available only one time in the HTML archive, for example, the navbar, logo, etc. You may see our guide on how to create a scroll navigation link using # and ID.
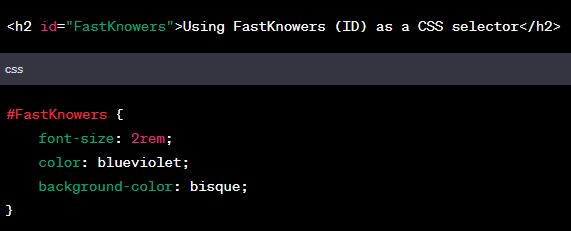
From the code below, it is meant that:
font-size: 2rem;: Sets the text dimension (font size) to 2rem.color: blueviolet;: Sets the text color to blue-violet.background-color: bisque;: Sets the background color to bisque.
Making Pseudo-classes With CSS
Pseudo-classes are classes that are enacted when certain catchphrases are added to a selector that indicates a specific state. For instance, the pseudo-class: hover is utilized to fundamentally have an impact on the condition of the component when a client floats the pointer over it.
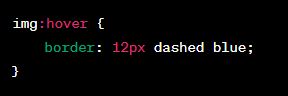
If we add this CSS code to the picture, it sets a 12-pixel dashed border with a blue color when the image is hovered over.
The div tag is frequently used to indicate the holder for HTML components. It can likewise be utilized to structure the format of the page. Presently, how about we comprehend how to style the div component and its youngster components?
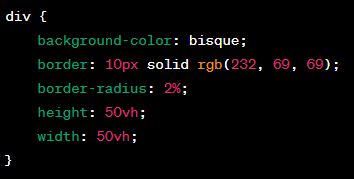
In this code, it is meant that:
background-color: bisque;: Sets the background color to bisque.border: 10px solid rgb(232, 69, 69);: Sets a 10-pixel solid border with an RGB color.border-radius: 2%;: Applies a 2% border radius for rounded corners.height: 50vh;: Sets the height to 50% of the viewport height.width: 50vh;: Sets the width to 50% of the viewport height.
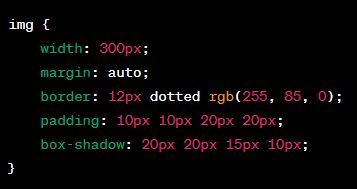
Adding an image HTML with CSS
Prior to understanding how to change the substances such as cushioning, line, and edges of an HTML component, we should comprehend the CSS box model.
1. Content box: It is the space where the substance of the HTML component shows up, like pictures, text, and that’s just the beginning.
2. Cushioning: It is the straightforward region around the substance of the component.
3. Line: It is the crate encompassing the cushioning box. Of course, the worth of the line for each HTML component is zero; be that as it may, expanding the boundary esteem builds the space between the cushioning and the edge box.
4. Edge: It is the straightforward region outside the line box.
We should accept the case of the past picture to comprehend how to change these qualities.
Step-by-step guides on how to use CSS and HTML to create websites
Prior to beginning our HTML and CSS site project, how about we set the fundamental envelope and document structure as per how you will code the whole task? We should name our envelope “Fabricate a site HTML”. Inside the envelope, make a new “index.html” record and two organizers named “CSS” and “pictures.” Make a “style.css” document inside the CSS organizer and store every one of the important pictures expected in the undertaking inside the pictures organizer.
Making a gorgeous site with the assistance of HTML and CSS is very conceivable. HTML represents Hypertext markup language and gives the skeleton to our site. Nonetheless, CSS (Flowing Template) permits the skeleton to all a more great look. Allow us to utilize seven moves toward making a gorgeous site.
Step 1: Make a Design
First, make a fundamental design of your site as an unpleasant sketch. There are a ton of free internet-based administrations that will assist you with planning your site. Regardless, you should have an essential design of the site prepared.
Step 2: Set up the code
Here, add the standard code to the HTML record.
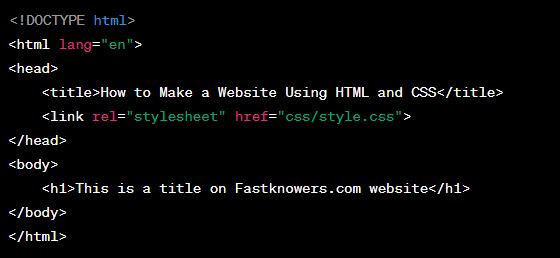
Prior to beginning the real satisfied add some test content in your HTML document, and run it on the program to test assuming that the code is turned out great.
Step 3: Make significant components in the format
Presently, make area components in the HTML record.
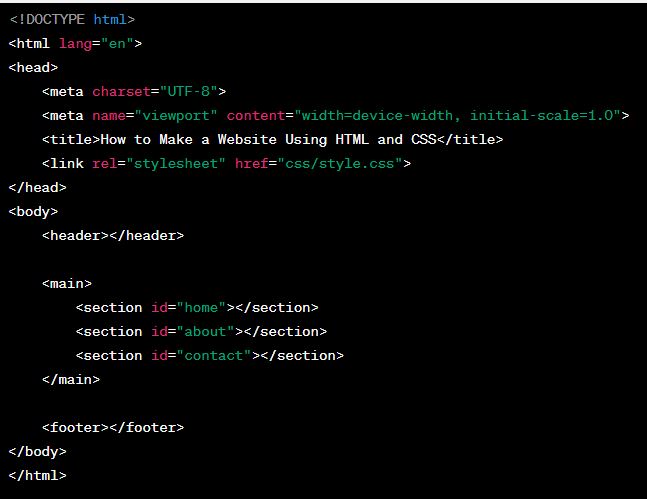
Stage 4: Make the HTML content
In the past step, you had made the components in the design. In this step, fill in the HTML content.
<main>
    <section id="intro">
        <div class="container">
            <img src="https://fastknowers.com/wp-content/uploads/2023/11/ebook-full.jpg" alt="Display Picture of Fastknowers e-Book">
            <h2>The name of this e-book is Fastknowers Web Design</h2>
        </div>
    </section>

    <section id="about">
        <div class="container">
            <h1>About Me</h1>
            <p>I am Abdulrazaq Yahaya from Fastknowers.com?</p>
            <ul>
                <li>Published date</li>
                <li>Name of Publisher</li>
                <li>Number of pages</li>
            </ul>
        </div>
    </section>

    <section id="contact">
        <div class="container">
            <h1>Web Design</h1>
            <p>In this book, the author has taught different strategies to make a website using HTML and CSS. If you are a beginner looking to learn web design, then this book is for you. In it, you will learn how to design the following websites:</p>
            <ul>
                <li>E-commerce</li>
                <li>School</li>
                <li>Casino</li>
            </ul>
        </div>
    </section>
</main>

<footer>
    <p>© Copyright 2023 Fastknowers.com. All rights reserved</p>
</footer>
Presently, in the event that you reload the page, you will get a result something like this. You are presently going to give this page a CSS in the subsequent stage to make it gorgeous.
Step 5: Make CSS for the design
Prior to adding the profundity in the CSS, let us first add some essential CSS to make our site page look fairly like the format that we planned in the initial step.
Besides, we connected our HTML record to a CSS document in the second step while composing our standard code. Add the essential design CSS in the connected CSS document. In this step, we will zero in on level, width, cushioning, and edge, and show the areas and pictures, to make them movable as per the page.
* {
padding: 0;
margin: 0;
}
header {
height: 45px;
}
header nav ul {
display: flex;
margin-left: 80%;
}
header nav ul li {
padding-left: 10%;
}
section {
height: 100vh;
border: 1px solid dim;
display: flex;
justify-content: center;
align-items: center;
}
.Container {
margin-top: 10%;
}
.Container img {
height: 300px;
}
.Container h2 {
margin-top: 3%;
}
footer {
line-height: 40px;
display: flex;
justify-content: center;
}
Step 6: Make CSS to style individual components
In this step let us style individual substance. Allow us to zero in on properties like text style, boundary, and varieties, and that’s just the beginning.
body, h1, h2, p, ul, li {
margin: 0;
padding: 0;
}
header {
height: 45px;
}
header nav ul {
display: flex;
margin-left: 70%;
list-style: none;
}
header nav ul li {
padding-left: 10%;
}
header a {
text-decoration: none;
color: brown;
}
section {
height: 100vh;
border: 1px solid dim;
display: flex;
justify-content: center;
align-items: center;
}
.Holder img {
height: 300px;
margin-bottom: 50%;
}
.Holder h2 {
margin-top: 2%;
font-size: 3em;
font-family: ‘Lucida Sans’, ‘Lucida Sans Regular’, ‘Lucida Grande’, ‘Lucida Sans Unicode’, Geneva, Verdana, sans-serif;
}
.Holder p,
.Holder ul {
margin-top: 2%;
font-size: 1.5rem;
}
footer {
line-height: 40px;
display: flex;
justify-content: center;
font-size: 1rem;
}
Step 7: Add foundation tone and style
In this step, let us add some final details, and our site is prepared. Allow us to add a foundation picture and foundation tones to the segments.
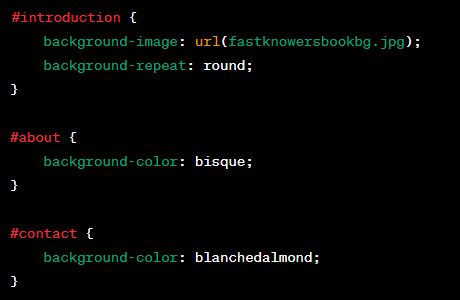
Subsequent to finishing the whole code of our site, it will look something like this. Note that you can add more CSS to make it further attractive.
Testing an underdevelopment website
It is incredibly important to test your site prior to facilitating it for certifiable clients. Testing prior to facilitating your site live allows you to dispense with every one of the blunders that may be in your site.
Conclusion
The time taken to create a website using HTML and CSS relies upon a few elements, for example, the intricacy of the site, how features are to be added, and the expertise level of the developer. A straightforward site with a couple of pages and fundamental styling can take a couple of days or weeks, while a more intricate site with dynamic usefulness and special craft might require months to finish.
No matter the type of website you want to create, make sure to draw a plan for it, get its HTML structure, code a CSS to style, add content (text, image, document, etc.) to your site, and finally don’t forget to test your site before sharing it out for the public to use it.
Hope this article has helped you know how to create a website using HTML and CSS. You may also see our expert guide on complete code for e-commerce websites (HTML, CSS, and JavaScript).
If you know that this guide has helped you know how to create a website using HTML and CSS, then subscribe to our YouTube channel for more video updates regarding web design and development. You may also find me on Facebook.