One of the most effective ways to protect your blog from unwanted submissions is by adding a CAPTCHA to your forms. In this article, you will learn how to add a CAPTCHA to your website or blog’s forms in order to distinguish between human users and bots, prevent automated software from submitting spammy or malicious information on your website.
Do you want us to walk you through the process of adding a CAPTCHA to your blog’s forms, whether it’s for comments, contact forms, or any other user input fields so that you have a secure blog or website? If yes, then you are in the right place. You may see our guide on how to add a navigation menu on a WordPress blog and website.
Before we begin, we will show you different types of CAPTCHA, after that, we will show you top CAPTCHA generator platforms and finally how to add a CAPTCHA to your blog or website’s contact form. Fantastic, right?
Now, let us start.

Types of CAPTCHA
1. Text CAPTCHA
This is the type of CAPTCHA that attaches to a form where users are asked to type the letters or numbers they see in a distorted image.
2. Audio CAPTCHA:
This type of CAPTCHA is basically made for website users who are visually impaired, where they listen to a series of numbers or words and then type them out.
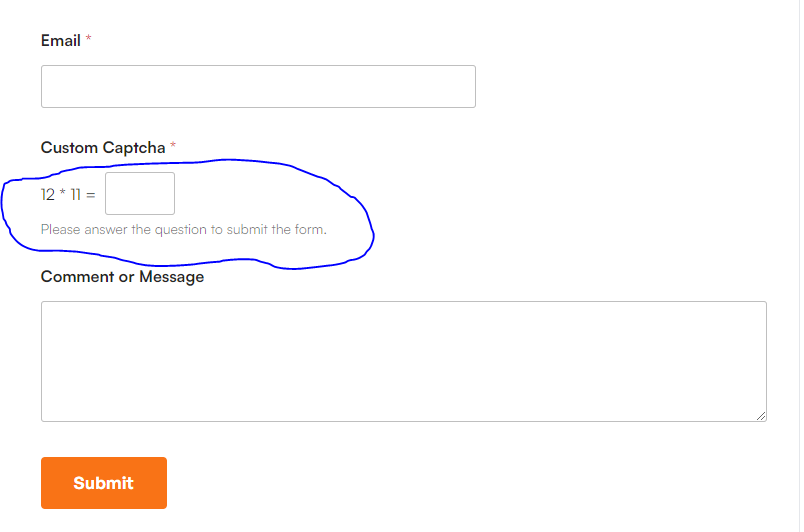
3. Math CAPTCHA:
Using this type of CAPTCHA, people are asked to solve a simple math problem, like “What is 3 + 5?” to prove they are human. This is often seen in comment forms.
4. Image-based CAPTCHA:
This type of CAPTCHA asks users to select specific images from a set based on certain criteria (e.g., “select all images with cars”).
5. Puzzle CAPTCHA:
Using this type of CAPTCHA, people are required to solve a simple puzzle, such as dragging pieces to complete an image.
6. Slider CAPTCHA:
If you want real people to register a form, slider CAPTCHA is the one you should use. When it is appropriately added to your website, it will ask people to slide a bar or drag an object to a specific point.
7. NoCAPTCHA reCAPTCHA:
This is an earlier version of reCAPTCHA (Google owned CAPTCHA) where poeple only need to check a box that says, “I’m not a robot,” although it sometimes asks for additional verification when it detects malicious activities.
8. Time-based CAPTCHA:
Time-based CAPTCHA is the the type that when it is added to a form, it measures the time a user takes to fill it out, and if the time is too short or too long, it may suspect bot behavior. This is often used in conjunction with other CAPTCHA methods.
I hope you always see those types of CAPTCHA when doing something on other websites and blogs. Comment below. For assistance on adding any of those types of CAPTCHA on your website, feel free to contact us.
Now, let us show you top CAPTCHA generators in 2024.
Top CAPTCHA generators in 2024
1. Google reCAPTCHA
Google reCAPTCHA is one of the most widely used CAPTCHA generators. It offers a range of versions from simple checkbox verification to more complex challenges like image recognition. It’s highly effective and integrates easily with various platforms such as WordPress, Blogger, etc.
Note that it is free for small website and companies and has paid options for big enterprises. Visit Google reCAPTCHA.
2. hCaptcha
hCaptcha is an alternative to reCAPTCHA that focuses on user privacy. It offers a similar experience to reCAPTCHA with visual challenges, and it’s used by websites that want to avoid Google services.
Note that it is free for small website and companies and has paid options for big enterprises. Visit hCaptcha for more information.
3. Cloudflare Turnstile
Cloudflare Turnstile is a free CAPTCHA that focuses on user-friendliness and privacy. It automatically identifies bots without requiring user interaction which make it to be known a seamless CAPTCHA generator.
Note that Cloudflare Turnstile is free as at the time of typingvthis post. Visit Cloudflare Turnstile for more information.
4. WPForms CAPTCHA (Google reCAPTCHA & hCaptcha)
WPForms is a popular WordPress form builder that integrates with Google reCAPTCHA and hCaptcha. It allows you to easily add CAPTCHA to your forms in order to add a strong protection of your website against spam and bots.
Note that WPforms custom CAPTCHA can only be added to your website when you are any of their premium plans. You may visit their website for more.
5. Akismet or Antispam Bee
While Akismet is used as an anti spam, it can also be used to serve as an alternative to traditional CAPTCHA to filter spam comments automatically without requiring user interaction.
You can try to install either Antispam Bee or Akismet plugin on your blog. Spam comment filters of these plugins (Akismet or Antispam Bee) work by taking the text submitted by the commenters and passing it through a series of checks.
The spam filter will take into account things like the links in the text, spammy words and suspect IP addresses. Any comment that doesn’t pass the test will be marked as spam for review or automatically deleted depending on how you set up the spam plugin.
You may visit their website; Akismet and Antispam Bee for more information. Note that on their free plan, their spam filter CAPTCHA will work.
6. Friendly Captcha
Friedly Captcha is a paid (with a free trial) privacy-first CAPTCHA generator that’s GDPR-compliant and user-friendly that doesn’t rely on tracking or collecting personal data. Visit Friendly Captcha website for more.
7. BotDetect CAPTCHA
This is also a paid (with a free trial) CAPTCHA generator that offers both visual and audio CAPTCHAs. It’s available in self-hosted and cloud-hosted versions. Visit BotDetect CAPTCHA for more information.
8. Solve Media
Solve Media is another CAPTCHA generator that use on your website and blog. It is available in both free and paid version. Sadly, a free contains addvert while a paid version does not
For more information, please visit Solve Media website.
9. KeyCAPTCHA
- KeyCAPTCHA is a free with paid options that generate CAPTCHA for people on your website to complete a puzzle or drag-and-drop tasks. Visit their website KeyCAPTCHA for more information.
10. CAPTCHA.com
Captcha.com is a paid (with a free trial) CAPTCHA generator that offers both image and text CAPTCHAs. It can be integrated into various platforms and provides customizability. For integration and more information, visit CAPTCHA.com.
11. Securimage
Securimage is a free and an open-source CAPTCHA script that allows text and image CAPTCHAs. It can be self-hosted and customized according to specific needs. Visit Securimage website for more.
Above are top 11 CAPTCHA generator. Hope you found them helpful.
Next, I will show you how to add a CAPTCHA to your website or blog contact form. Are you ready.
Now, let us start.
How to add a CAPTCHA to your website or blog contact form using WPforms plugin
Do you want to stop spammers from filling out your contact forms? WPForms plugin is here to help your website or blog contact forms get a strong CAPTCHA which you can select the one you want to use from multiple options.
This guide will walk you through how to add a CAPTCHA on your website or blog’s contact form using WPForms plugin.
We shall use the reCAPTCHA generator to add CAPTCHA on a blog or website. Note that WPForms is a WordPress plugin available in both free and paid version. Happily, you can add any CAPTCHA generator with any version of WPForms you are using, including WPForms Lite (free version).
If you want to use WPForms to make it harder for spam to come through your contact forms, you can buy a paid version of WPForms plugin to get access to their custom Captcha.
You may see our expert guide on how to install plugins on the WordPress website.
Now, let us start to show you how to add top best Google CAPTCHA generators (reCAPTCHA) on your WordPress-powered website and blog using a free version of WPForms plugins.
Steps to setting up of Google reCAPTCHA on a WPForms plugin contact form
Adding reCAPTCHA allows you to use human verification technology in your forms, which can decrease the number of spam submissions you receive. In this section, I will show you how to set up and use the reCAPTCHA generator on your contcat forms using WPForms.
By now, I hope that you have already installed and activated WPForms plugin on your blog or website. You may see our step-by-step guide on how to install and activate plugins on the WordPress website. If you read that guide, you will know how to install and activate any plugin on WordPress.
Step 1: Accessing WPForms CAPTCHA settings
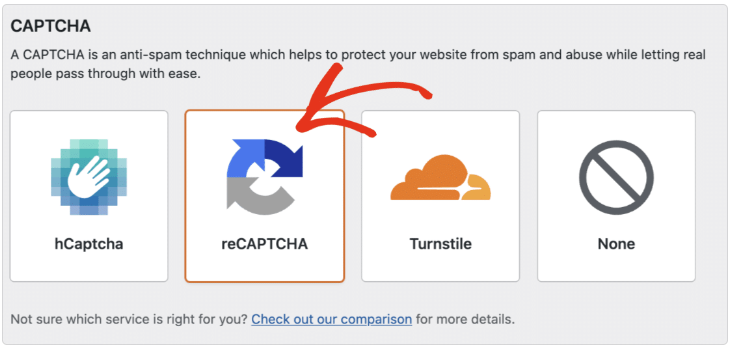
- To get started, you’ll need to log in to your WordPress site and go to WPForms » Settings. Then, click on the CAPTCHA tab.

- To configure Google reCAPTCHA, select the reCAPTCHA option.
- Then, in the settings that appear, go ahead and select the reCAPTCHA Type you’d like to use. Note that each reCAPTCHA type requires a different set of keys, so if you later decide to switch types you will need to generate a new set of keys.

Step 2: Generating reCAPTCHA Keys in Google
You’ll need to set up reCAPTCHA in your Google account to generate the required keys. To start this setup process, you’ll need to open Google’s reCAPTCHA admin console.
Here you’ll be asked to sign in to your Google account. What you see on login will depend on whether you’ve set up reCAPTCHA with this account before.
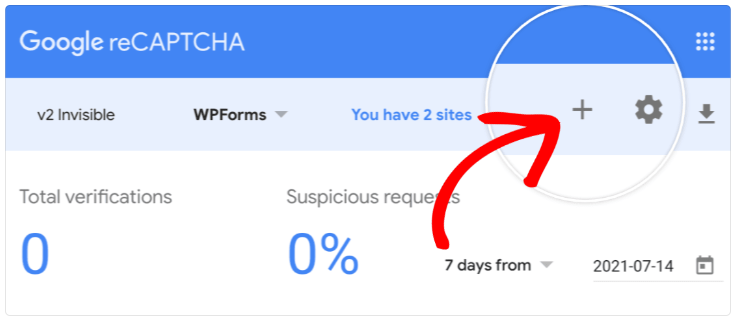
If you have set up a reCAPTCHA with this account in the past, you’ll need to click the + (plus) icon to add a new site.
If you’ve never set up reCAPTCHA before, you’ll be directed straight to the reCAPTCHA setup form.
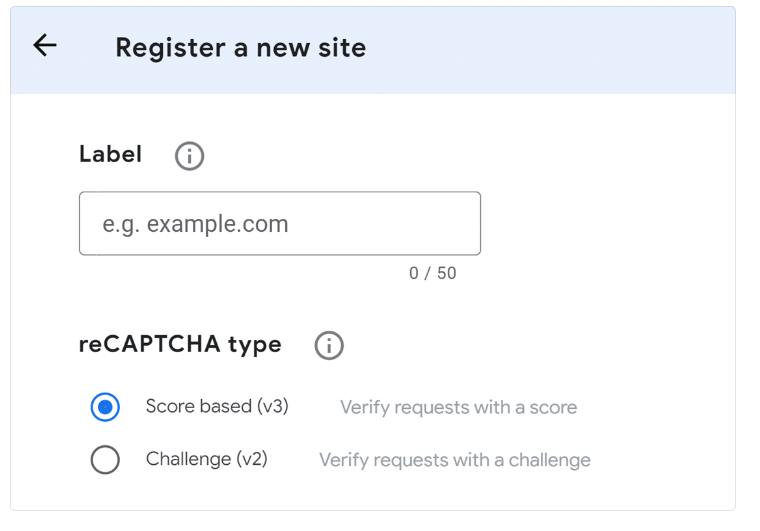
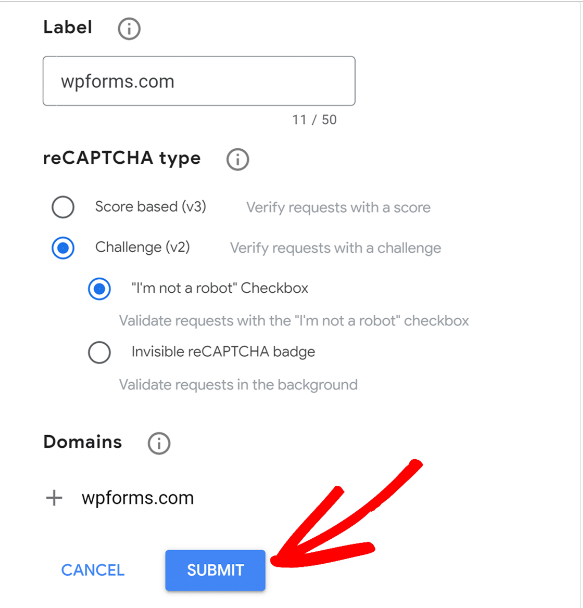
Below, you’ll find more details on how to fill out each field in this form.
- Label: This is only visible to you, so enter any name that makes logical sense (most commonly the website name).
- reCAPTCHA type: Select the version of reCAPTCHA that you’d like to use. Note that if you choose to enable the v3 reCAPTCHA, no reCAPTCHA badge will be shown on the frontend of your site when used with a Conversational Form.
- Domains: Enter the URL where you’ll be using reCAPTCHA. Do not include “http://www” at the start (for example, wpforms.com would be accepted, but https://wpforms.com or www.wpforms.com would not).
Once the form is complete, go ahead and click the Submit button.
After registering, you should see a page with the keys for your website.
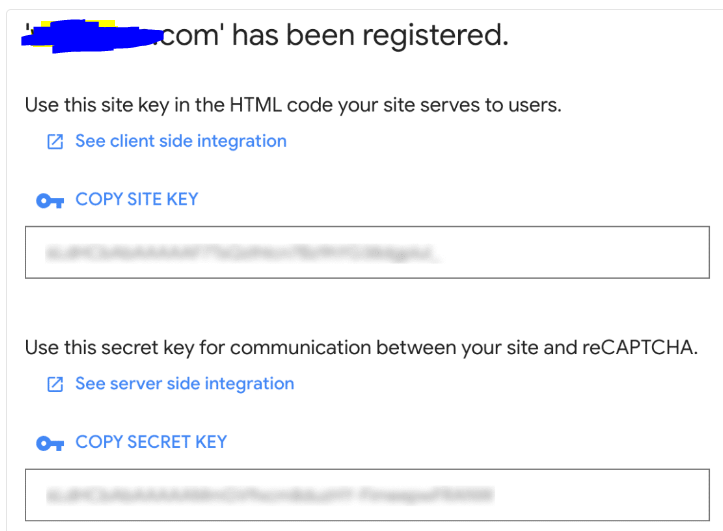
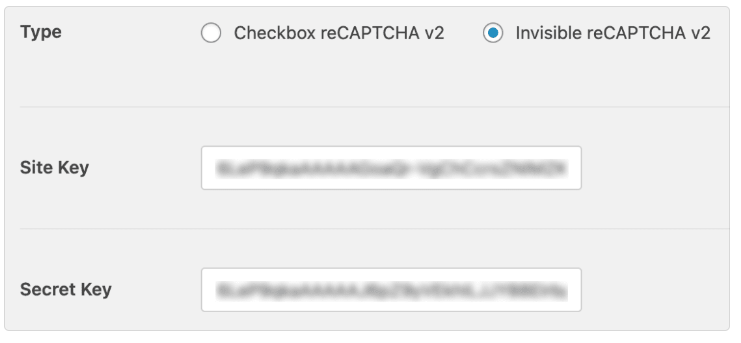
You’ll need to copy the Site Key and Secret Key. Then, switch back to your WordPress dashboard and go to WPForms » Settings. Then, click on the CAPTCHA tab. From here, scroll down and paste these keys into the corresponding Site Key and Secret Key fields.
Now that you’ve added your reCAPTCHA keys, you can also optionally adjust other reCAPTCHA settings.
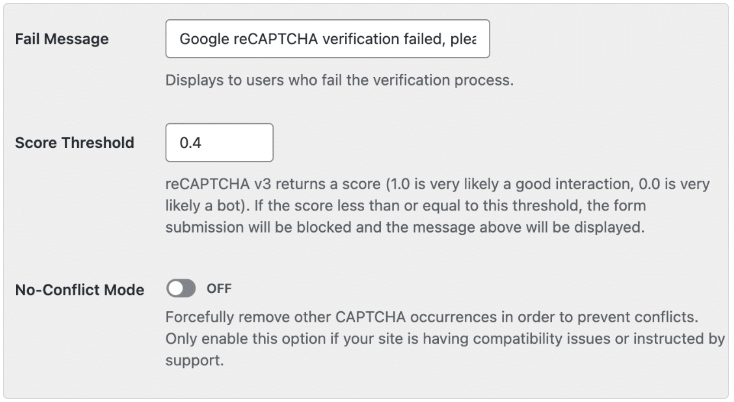
- Fail Message: This error will display to any user who does not pass reCAPTCHA’s verification test.
- Score Threshold (for reCAPTCHA v3 only): This is the score at which you want users to fail reCAPTCHA v3’s verification. Scores can range from 0.0 (very likely a bot) to 1.0 (very likely a good interaction).
- No-Conflict Mode: If reCAPTCHA is being loaded more than once on your site (for example, by both WPForms and your WordPress theme), it can prevent reCAPTCHA from working properly. No-Conflict Mode will remove any reCAPTCHA code that’s not loaded by WPForms.
- Preview (for Checkbox reCAPTCHA v2 only): If reCAPTCHA is configured correctly, you’ll see a preview of what it will look like on your site.
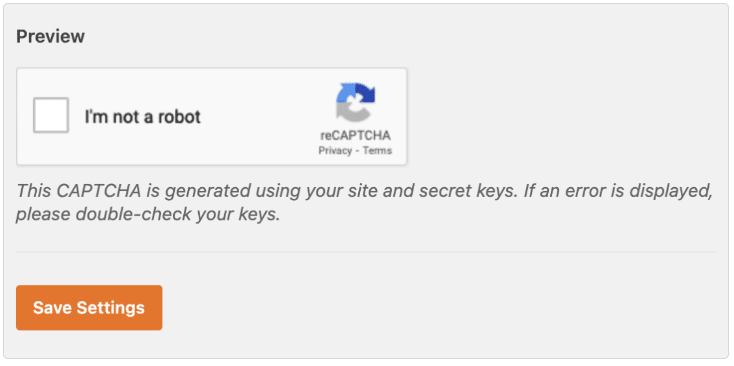
- Be sure to click on the Save Settings button at the bottom of this page to store your setting changes.
Step 3: Adding reCAPTCHA to a Form
Now that you’ve set up your reCAPTCHA keys, you’ll be able to add reCAPTCHA to any of your WPForms.
To do this, go ahead edit the form you want to add a reCAPTCHA on.
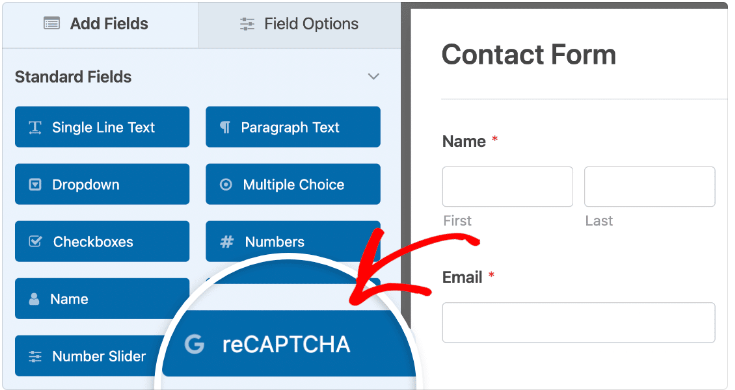
After you’ve opened the form builder, look under the Standard Fields section and click on the reCAPTCHA field.
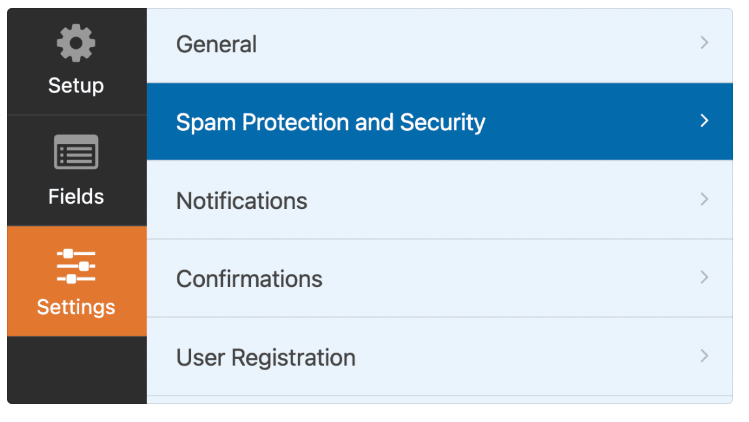
Alternatively, you can always enable reCAPTCHA by going to Settings » Spam Protection and Security in the form builder.
Here you’ll see details about the available spam protection settings WPForms provides.
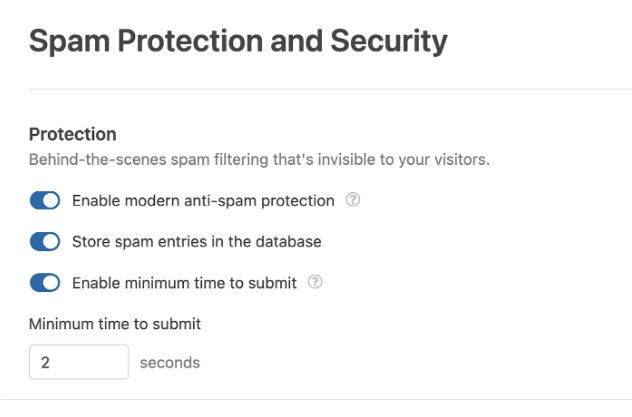
Note: The Enable Minimum time to submit option helps prevent bot submissions by setting a minimum time before submissions are allowed on the form.
Next, scroll down to the section labeled CAPTCHA. You’ll need to toggle the switch to the “on” position.

Note: The label on the CAPTCHA switch depends on the version of reCAPTCHA you configured. For example, if you set up reCAPTCHA v3, the label will read “Enable Google v3 reCAPTCHA.”
To confirm that your reCAPTCHA is enabled, look for the badge in the upper right corner of the form builder.
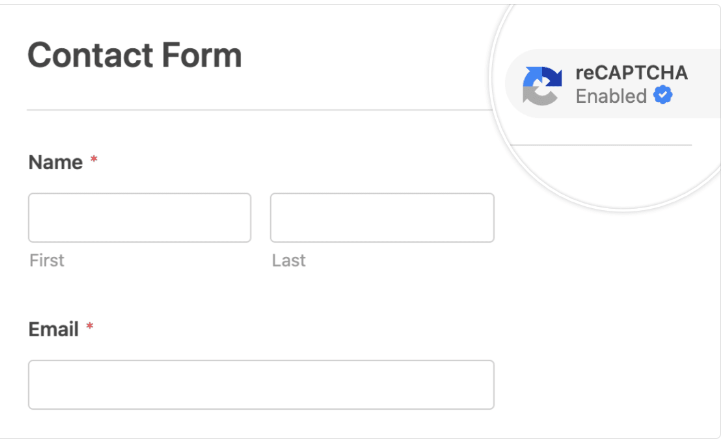
Note: If no badge appears in your form builder, make sure you’ve correctly set up your reCAPTCHA keys.
Step 4: Testing reCAPTCHA
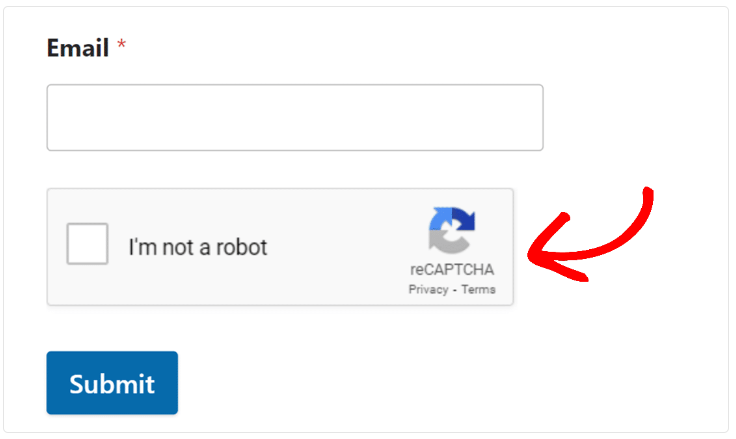
The last step is to run a quick test to ensure that reCAPTCHA looks and works as you expect. To test this out, you’ll need to submit the form to initiate the reCAPTCHA verification process.
If you’ve set up Checkbox reCAPTCHA v2, when filling out your form, you’ll be asked to verify that you’re human. This often involves clicking on a checkbox or identifying specific images in a set. If you see this, then reCAPTCHA is working correctly.
Note: Sometimes, when using reCAPTCHA on a payment form, users can submit the form without completing the CAPTCHA verification. This is because WPForms security detects it as a legitimate entry if the payment is successful.
If you’ve configured Invisible reCAPTCHA v2 or reCAPTCHA v3, you won’t see this interactive step. However, look for a reCAPTCHA badge (usually in the lower right corner of your screen), signifying the presence and operation of reCAPTCHA v3.
Conclusion
Hope this article is helpful. Feel free to share your comment below. For more updates, please remember to subscribe to my YouTube channel if you know that this article has helped you know everything about CAPTCHA and how to add a Google CAPTCHA (reCAPTCHA) to your website or blog.